")
The MP-841 is a wireless digital pet immune PIR detector that allows the detection of movement within a targeted area (supported by Zigbee Home Automation 1.2). It has an exceptional transmission range (diversity antenna) and 15m (49 ft.) of detection range with pet immune (up to 38Kg/85lb). The detector has a sleek design with more than 5 years of battery life.
Specifications Installation Pairing Resetting and Changing Batteries
Features and Specifications
- Superior detection abilities 15 x 15 m (49 x 49 ft.) / 90°C
- Pet Immune (up to 38Kg/85lb)
- Easy installation with high-strength mounting tape (included)
- User friendly battery replacement process
- Battery Life estimation is more than 5 years (for typical use)
- Diversity antenna
- Tamper alert is reported when a tamper event occurs.
- Compliant with Zigbee 1.2 HA
- OTA firmware upgrade support
Technical Specs
- Battery: Two 3V Lithium batteries, type CR-123A. For UL installations, use Panasonic or GP only
- Nominal Battery Capacity: 1400 mAh
- Dimensions 83X61X42mm (3.27” x 2.4” x 1.66” / H x W x D)
- Operating Temperature -10°C to 50°C (14°F to 122°F) indoors
Installation
General Guidance for Installation
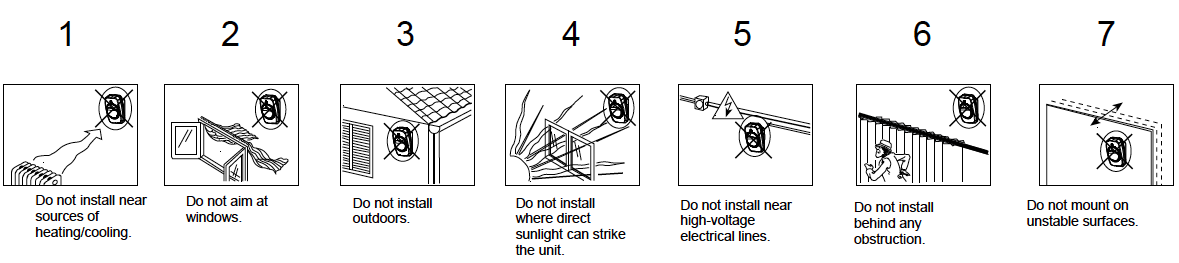
1. Do not install near sources of heater/cooling.
2. Do not aim at windows.
3. Do not install outdoors.
4. Do not install where direct sunlight can strike the unit.
5. Do not install near high-voltage electrical lines.
6. Do not install behind any obstruction.
7. Do not mount on unstable surfaces.
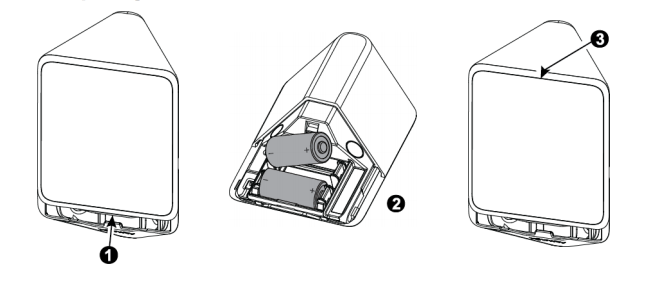
Installation Procedures
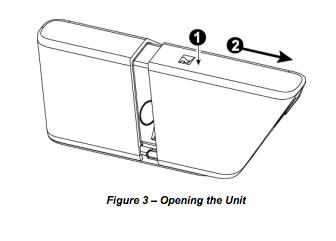
- Press in the tab on the back of the module
- Slide the bracket away from the detector to separate the two pieces and expose the batteries.
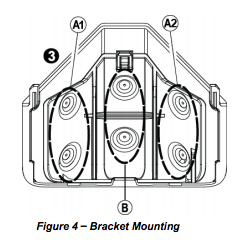
3. Mount the bracket to the wall and install new batteries
OR
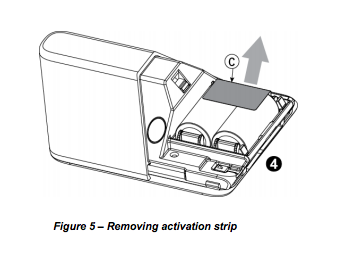
4. If batteries are already installed, removed the activation strip from detector.

5. Mount the detector on the bracket by sliding it downward until a click is heard
6. Keep the protective film on the unit until after the unit is mounted in its final location and ready for walk test, then remove it.
Walk Test
Walk in front of the motion detector in both directions. The LED should light for 2-3 seconds each time your motion is detected. (Keep in mind that the detector will sleep for 2 min after detecting motion in an effort to save battery life.)
Important! Walk test at least once a week to verify proper function of the detector.
Pairing
Sensors can be added to your system during activation, or at a later time. If you want to add a sensor that was not included with the original Touchstone package, make sure your service provider supports it.
Note: If you are attempting to pair a sensor that has been previously deleted from the Hub, it will be necessary to default the sensor.
To add a sensor, click SETTINGS on the toolbar to display the Settings page. The number in the upper right hand corner of each icon indicates how many instances of that type of device have been installed already.
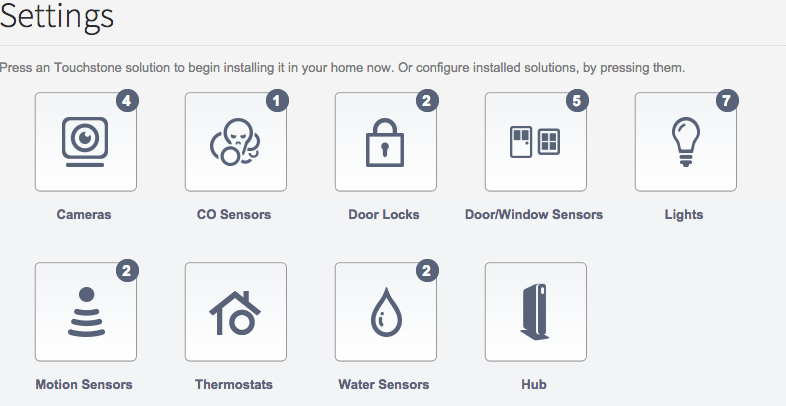
Click the type of sensor you want to add(i.e. door/winow, motion, etc) to display the sensor’s settings.
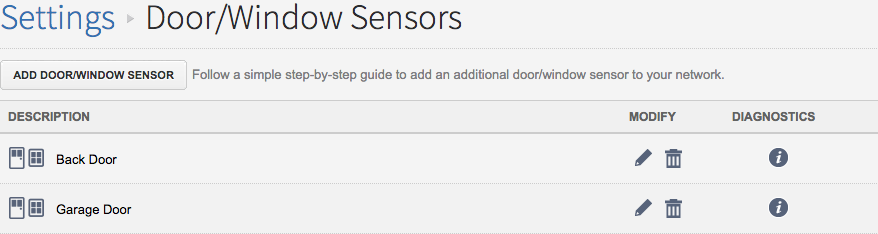
Click Add Door/Window Sensor(or whichever type of sensor you are attempting to add) and follow the on screen prompts.
Resetting and Changing Batteries
Changing Batteries
- Press upward to separate the detector from the bracket.
- Replace the batteries
- Put the detector back onto the bracket.
Resetting
- Press upward to separate the detector from the bracket.
- Remove the batteries
- Hold down the tamper button and replace one of the batteries while holding down the tamper button.
- Release the tamper switch within 4 seconds