At least once per month, test your security system to ensure that it is working dependably. By default, the system lets you test the alarm without sending a signal to the central monitoring station, however, you can choose to report your alarms to the central monitoring station to ensure end-to-end integrity.
-
- Tap on the Settings app on the Home screen
- Enter the Master keypad code.
- On the Settings menu, tap Security > Alarm Test.
- The Alarm Test screen is displayed.
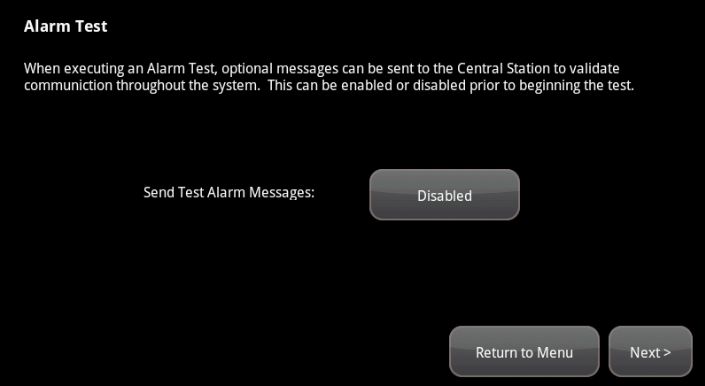
- To have your test alarms reported to central monitoring, tap Disabled.
The button changes to Enabled. Your test alarms will be sent to central monitoring.

NOTE: If the Enabled button is already displayed, tap Enabled to choose to have your test alarms NOT sent to central monitoring.
- Tap the Next button.
- The Alarm Test Checklist is displayed.
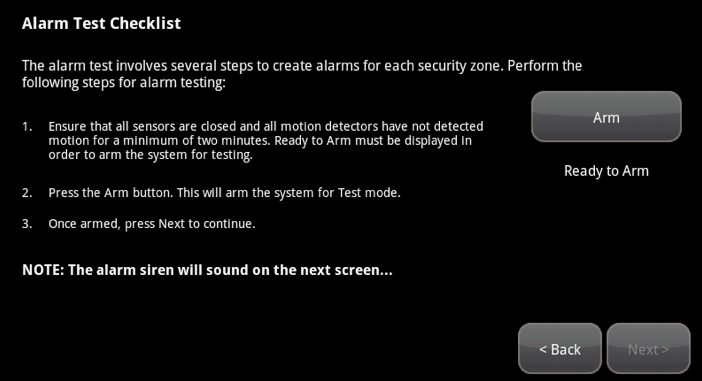
- Ensure all the security zones and the touchscreen are clear and not reporting troubles (that is, doors and windows are closed, motion detectors are not showing motion, touchscreen is not tampered, etc.).
- NOTE: The touchscreen will not arm if it is reporting a “System is Tampered” trouble, i.e., with the stand removed.
When the security zones are ready for testing, “Ready to Arm” is displayed under the Arm button.
- Tap Arm.
- Your security system is armed in the special Test mode. The Exit Delay is only 10 seconds long. Motion sensors are turned off (not tripping alarms but recording events) until an Entry/Exit security zone is faulted.
- The Arm button changes to a System Armed notice.
- Tap Next.
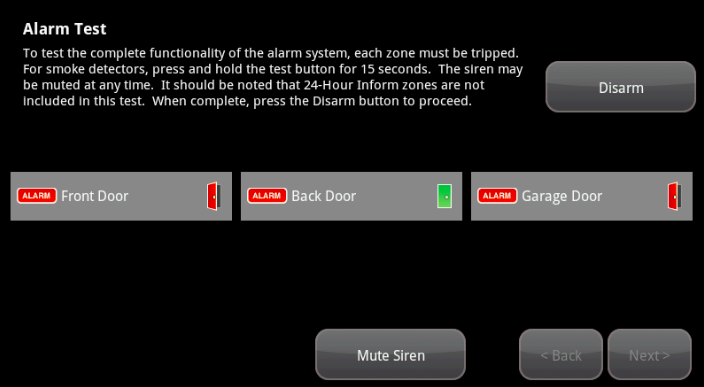
The Alarm Test screen is displayed, listing all the security devices.
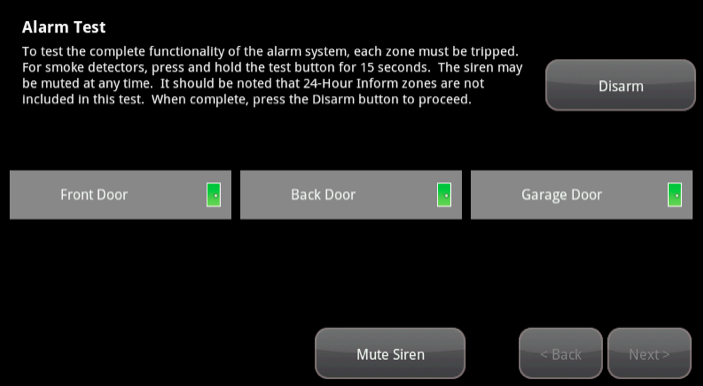
- Open and close an Entry/Exit door.
- The Entry Delay period starts (default 30 seconds). The touchscreen begins beeping once per second. The beeping speeds up to twice per second in the last 10 seconds of the Entry Delay period. The motion detectors are turned on.
- To mute the siren, tap Mute Siren. This is not recommended. Ensuring that your siren is in working order is an important part of the test.
- After the end of the Entry Delay period ends, the siren sounds (unless you muted it) and the Entry/Exit zone you faulted is marked with an alarm tag.
- Fault each additional device and ensure that it is marked as “alarm”. The following table shows the types of tests to perform.
- IMPORTANT: Allow the alarm to sound for a minimum of 30 seconds before disarming.
| Sensor | Testing Process |
| Door/Window | Open and close the door or window. |
| Motion Detector | Avoid the motion detector’s view for three minutes after arming the system, then walk in front of it. |
| Smoke Detector | Press and hold the sensor’s “Test” button until the siren sounds, approximately 10 seconds. |
| Carbon Monoxide Detector | Press and hold the sensor’s “Test” button until the siren sounds, approximately 10 seconds. |
| Water Detector | Dip the end of the sensor in a shallow bowl of water. |
| Glass Break Detector | Use a glass break simulator or create a loud, slamming noise. |
The touchscreen notes that each sensor communicated an event to the touchscreen and initiated an alarm.
- Once all the sensors are marked as “alarm”, tap Disarm to disarm the system.
- Tap Next to view the list of the alarms generated by the sensors.
- Tap Return to Menu when done.
- Once you have completed testing, navigate back to Security > Alarm Test and make sure the Send Test Alarm Messages option is set to “DISABLED“.