CLIP Applications

General Guidance for Installation

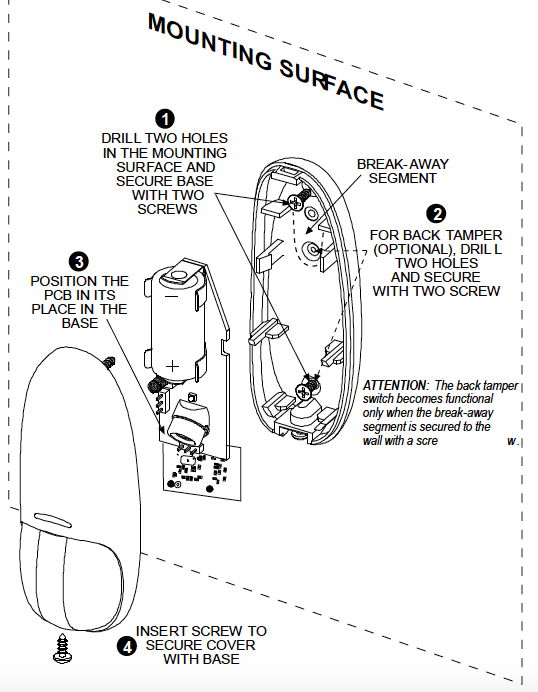
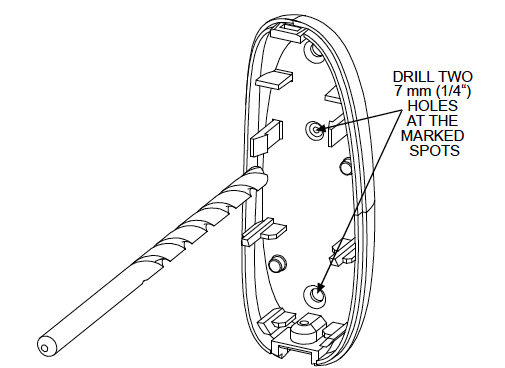
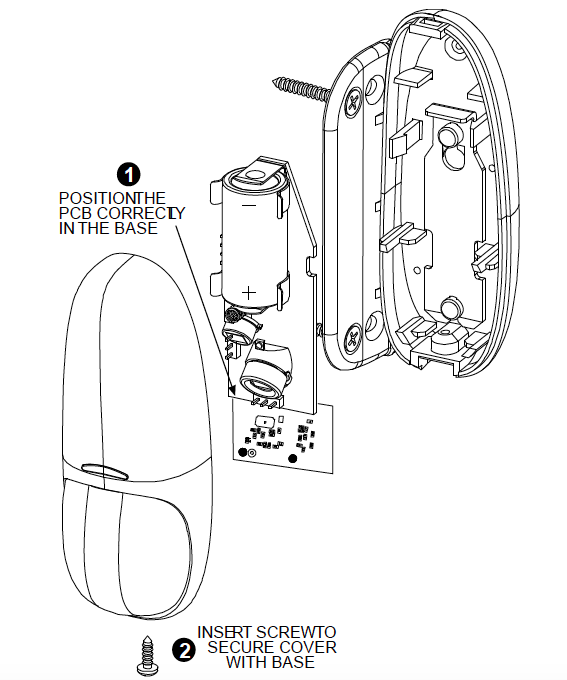
Installation Procedures
Regular Mounting

Bracket Mounting


Setting the Coverage and Range
A 4-pin jumper is used to select 3 ranges, according to the type of installation, for the curtain beams.

The purpose of the range setting is to ensure optimal signal processing and high immunity against false alarms. Mount the range jumper in the desired position and make sure that the protected area is within the selected coverage range. Carry out a walk test to verify proper performance.

Walk Test
- Mount the cover and tighten the screw. Wait for the detector to stabilize (the LED stops flashing approx. two minutes after the cover is closed).
- Walk slowly across the far end of the curtain pattern (in opposite directions). The LED indicator lights for approx. 3 seconds whenever you enter or exit a curtain beam.
Important: Perform walk test at least once a week to assure proper function of the detector.
Note: After closing the cover the detector enters a 15 minute walk-test mode. In this mode the LED will flash each time a detection occurs, regardless of LED jumper settings, and the detector will transmit on the occurrence of each detection event.