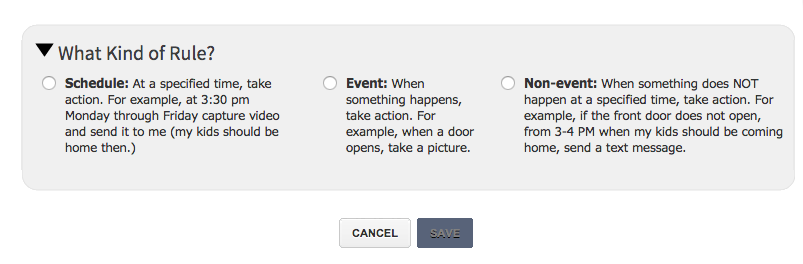
There are four(4) different types of rules that you can set up in your Touchstone system. Scroll through this article or click the type of rule you would like to set up.
Schedule: Actions occur regularly on specified times, dates, and date ranges without regard to an additional event.
Event: The rule triggers when an event occurs. Note: Event and Non-Event rules can also be set to apply only during specific time ranges and/or only on specific days of the week.
Non-Event: The rule triggers when an expected event does not occur. For example, send a text notification if the front door does not open between 3:30 PM and 4:00 PM on Monday through Friday when the kids are expected home. Note: Event and Non-Event rules can also be set to apply only during specific time ranges and/or only on specific days of the week.
Thermostat Schedule: This option launches the Thermostat Schedule Wizard to create a series of schedule type rules.
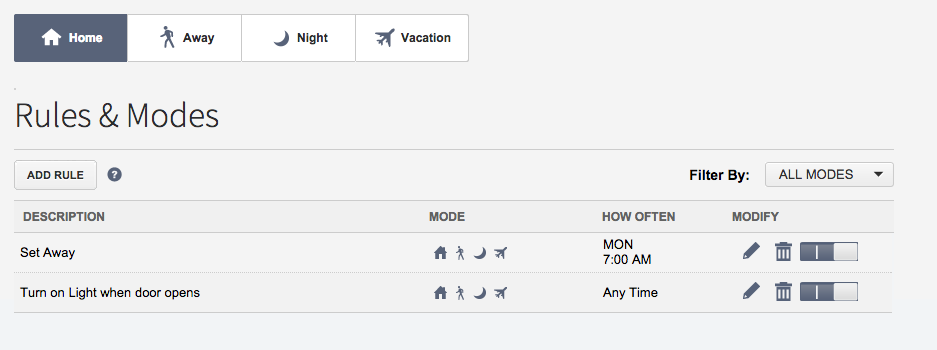
To add a rule, click on Rules and Modes>Rules and Modes on the toolbar to display the rules screen.
To Add An Scheduled Rule
Select “Schedule” from the add a rules screen.
The criteria options for scheduled rules are displayed.
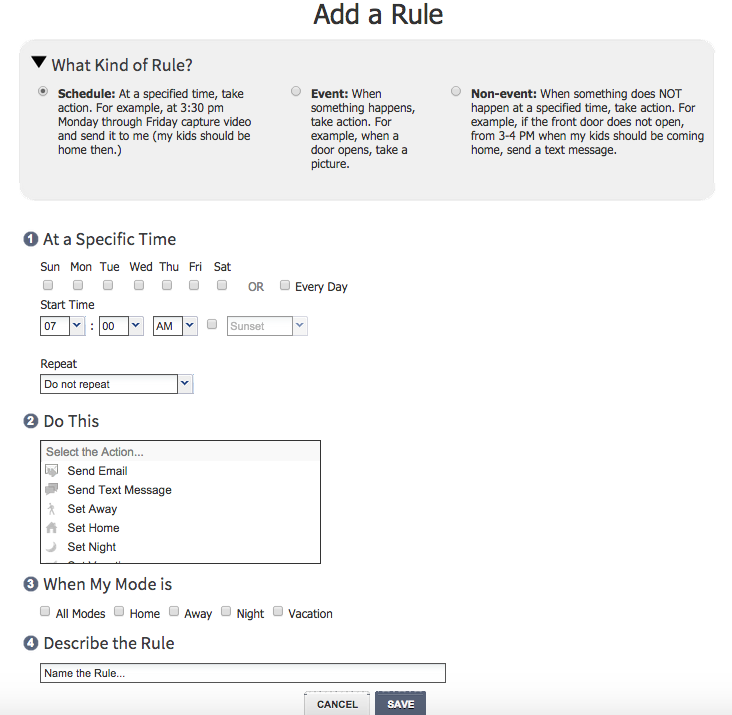
At a specific time: The time and say or the time/day range when the rule applies. For scheduled rules that apply during a time range, you can have the action repeat periodically during that time range. For example, you can have the system turn on a light for five minutes every 20 minutes between 7:00PM and midnight.
Do This: The action the rule takes.
When My Mode Is: The modes that the rule applies to.
Describe the Rule: This field changes based on the criteria you select. This will be the name of the rule. Modify this field as desired.
Click SAVE to set your rule.
Note: Thermostat rules can be created the same way all other scheduled rules are built, but it is easier to use theThermostat Scheduling Wizard. Rules created using this wizard are much more complex than normal scheduled rules.
To Add An Event Based Rule
Select “Event” from the add a rules screen.
The criteria options for scheduled rules are displayed.
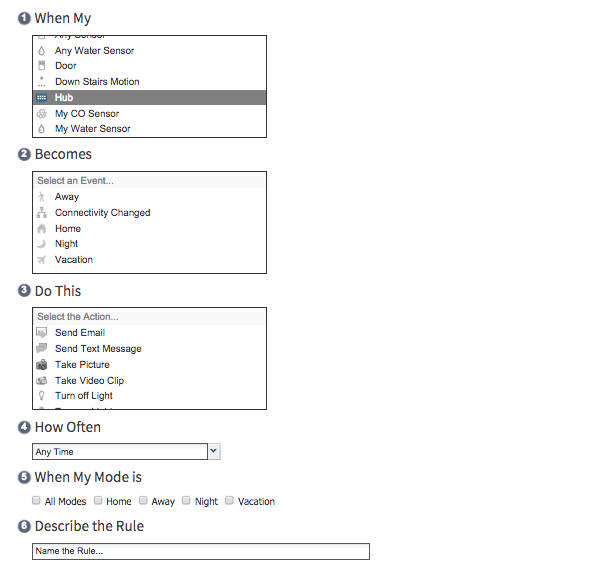
Becomes: Select an event. The list of events vary, depending on which item you selected in the When My field. For example, if you selected a door/window sensor, options involving opening and closing are displayed.
Do This: The action the rule takes.
How Often: The time range and days of the week when the rule is applicable. You can select Any Time to have the rule apply when the selected event occurs.
When My Mode Is: Specifies the modes in which the rule applies.
Describe the Rule: Name the rule
Click Save to set the rule.
Note: If a dimmable light is set to zero and a rule causes the light to turn on, the light level increases to 30% when it turns on. But if a dimmable light is set to any other value (even 1%), the light turns on at the specified setting.
To Add A Non-Event Based Rule
Select “Non-Event” from the add a rules screen.
The criteria options for scheduled rules are displayed.
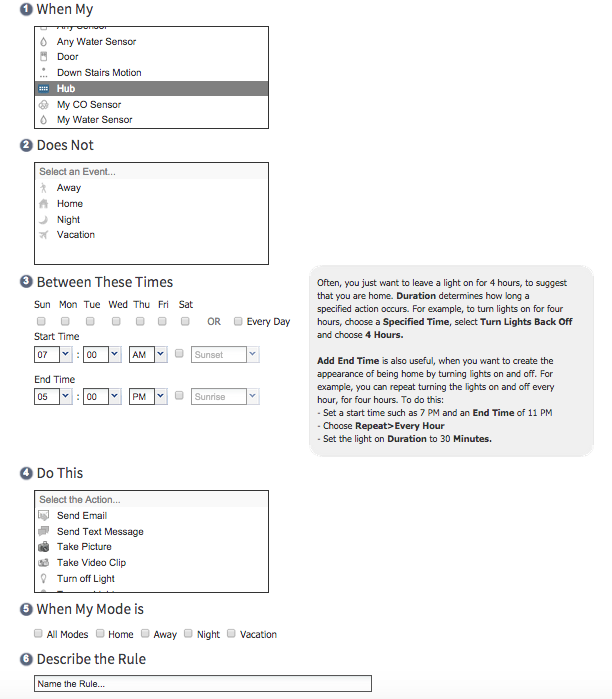
When My: Select a specific sensor, a sensor type, or the Hub.
Does Not: Select an event. The list of events vary, depending on which item you selected in the When My field. For example, if you selected a door/window sensor, options involving opening and closing are displayed.
Between These Times: The time/day range when the rule is applicable. Alternately, you can set times based on sunrise and/or sunset for your location.
Do This: The action the rule takes.
When My Mode Is: Specifies the modes in which the rule applies.
Describe the Rule: Name the rule
Click Save to set the rule.
Thermostat Scheduling Wizard
The easiest way to launch the Thermostat Scheduling Wizard is to click Thermostats>Thermostat Schedules from the toolbar.
Click the ![]() icon to toggle it to
icon to toggle it to ![]() . The temperature values are displayed in Celsius.
. The temperature values are displayed in Celsius.
Click the ![]() icon to toggle it to
icon to toggle it to ![]() . The temperature values are displayed in Fahrenheit.
. The temperature values are displayed in Fahrenheit.
Click Next to display the Set Your Schedule screen.
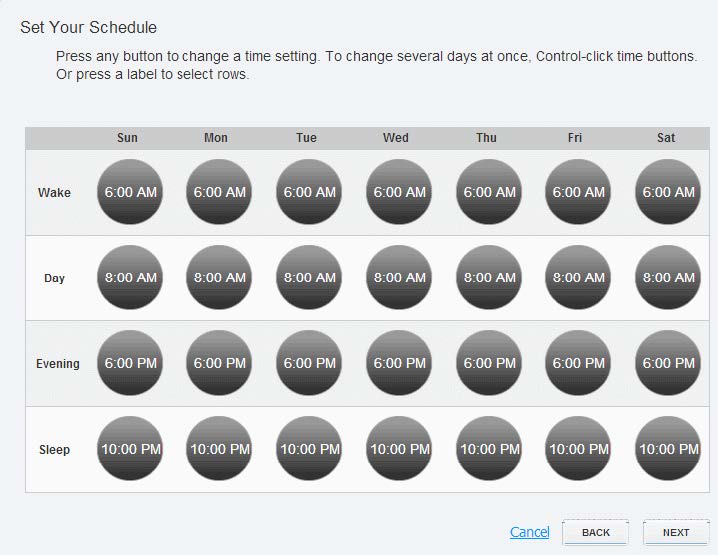
From this screen you will set up to four(4) times for each day of the week that the system will adjust the thermostat settings of ALL thermostats.
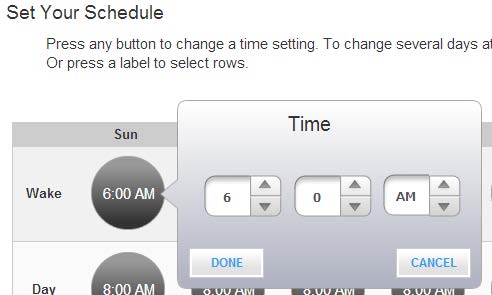
Click on each time on each day to set time for the temperature setting to change.
For example: On Sunday, you can plan for the thermostat(s) to set a particular temperature:
On Monday
At 5:00 AM so you will be comfortable when you wake up.
At 9:00 AM after everyone has left the house.
At 3:30 PM when the children return from school.
At 10:00 PM when everyone is going to bed.
After all the times have been set, click Next to display the cool settings.
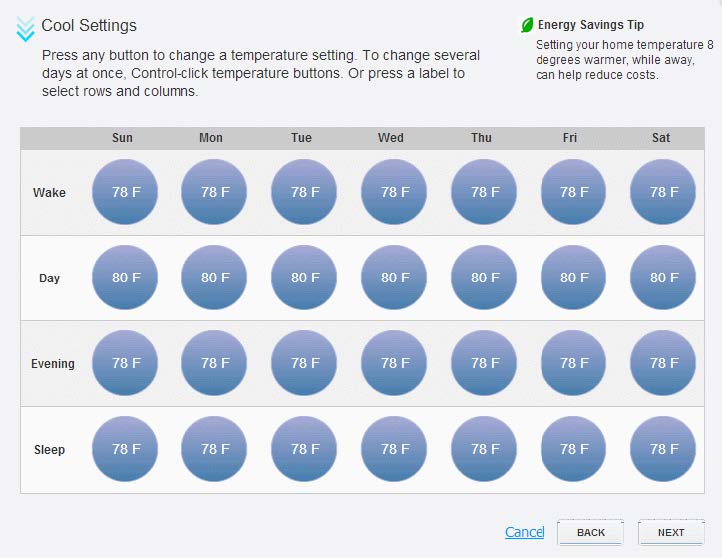
From this screen, you will set temperatures settings that the named thermostat will use at EACH time (that you configured in the previous screen) WHEN THE THERMOSTAT IS IN COOL MODE.
For example, these are the settings your system will use in the Summer.
Note: If you have more than one thermostat, you will get a chance to set that on later.
Click Next to move to the heat settings.
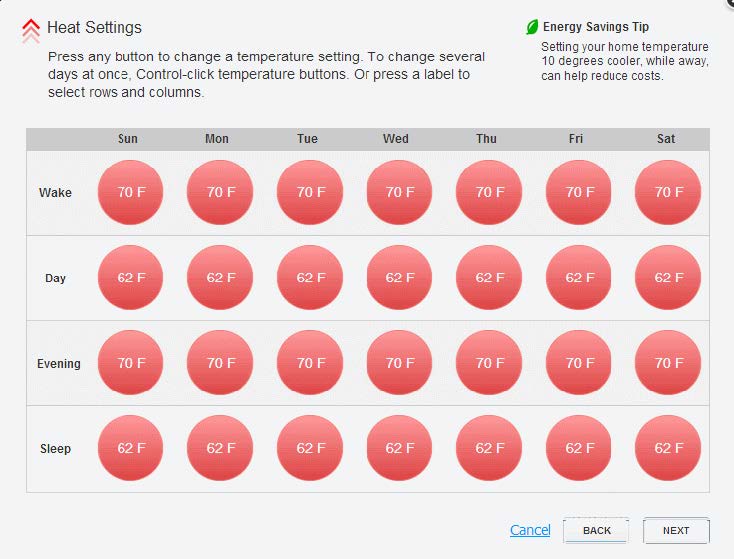
From this screen, you will set temperatures settings that the named thermostat will use at EACH time (that you configured in the previous screen) WHEN THE THERMOSTAT IS IN HEAT MODE.
For example, these are the settings your system will use in the Winter.
After the thermostats heat settings have been set, click Next. If you have more than one thermostat, you will repeat the cool and heat settings for each thermostat. Note: A separate schedule rule will be created for each thermostat.
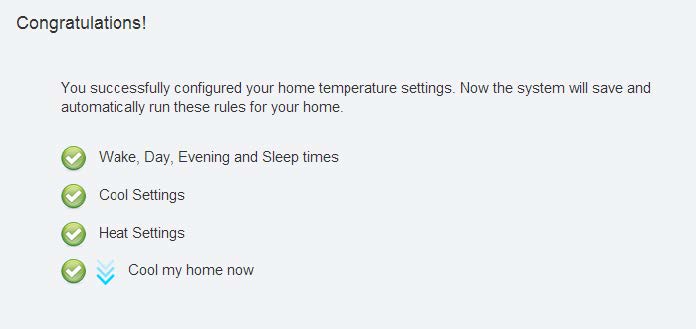
From this page, you will select whether ALL thermostats will start in Heat mode or Cool mode or to turn off the scheduling.
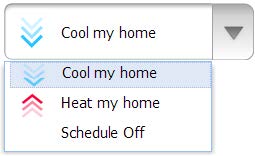
After you have selected the mode for your thermostats, click Next, and you will see a congratulations screen.