Log into the portal at https://www.reliatrac.com
The ReliaTrac portal gives the customer the ability to monitor current and past information , as well as create specific notification settings and GeoFences (using GPS to define a geographic boundary).
Tracking
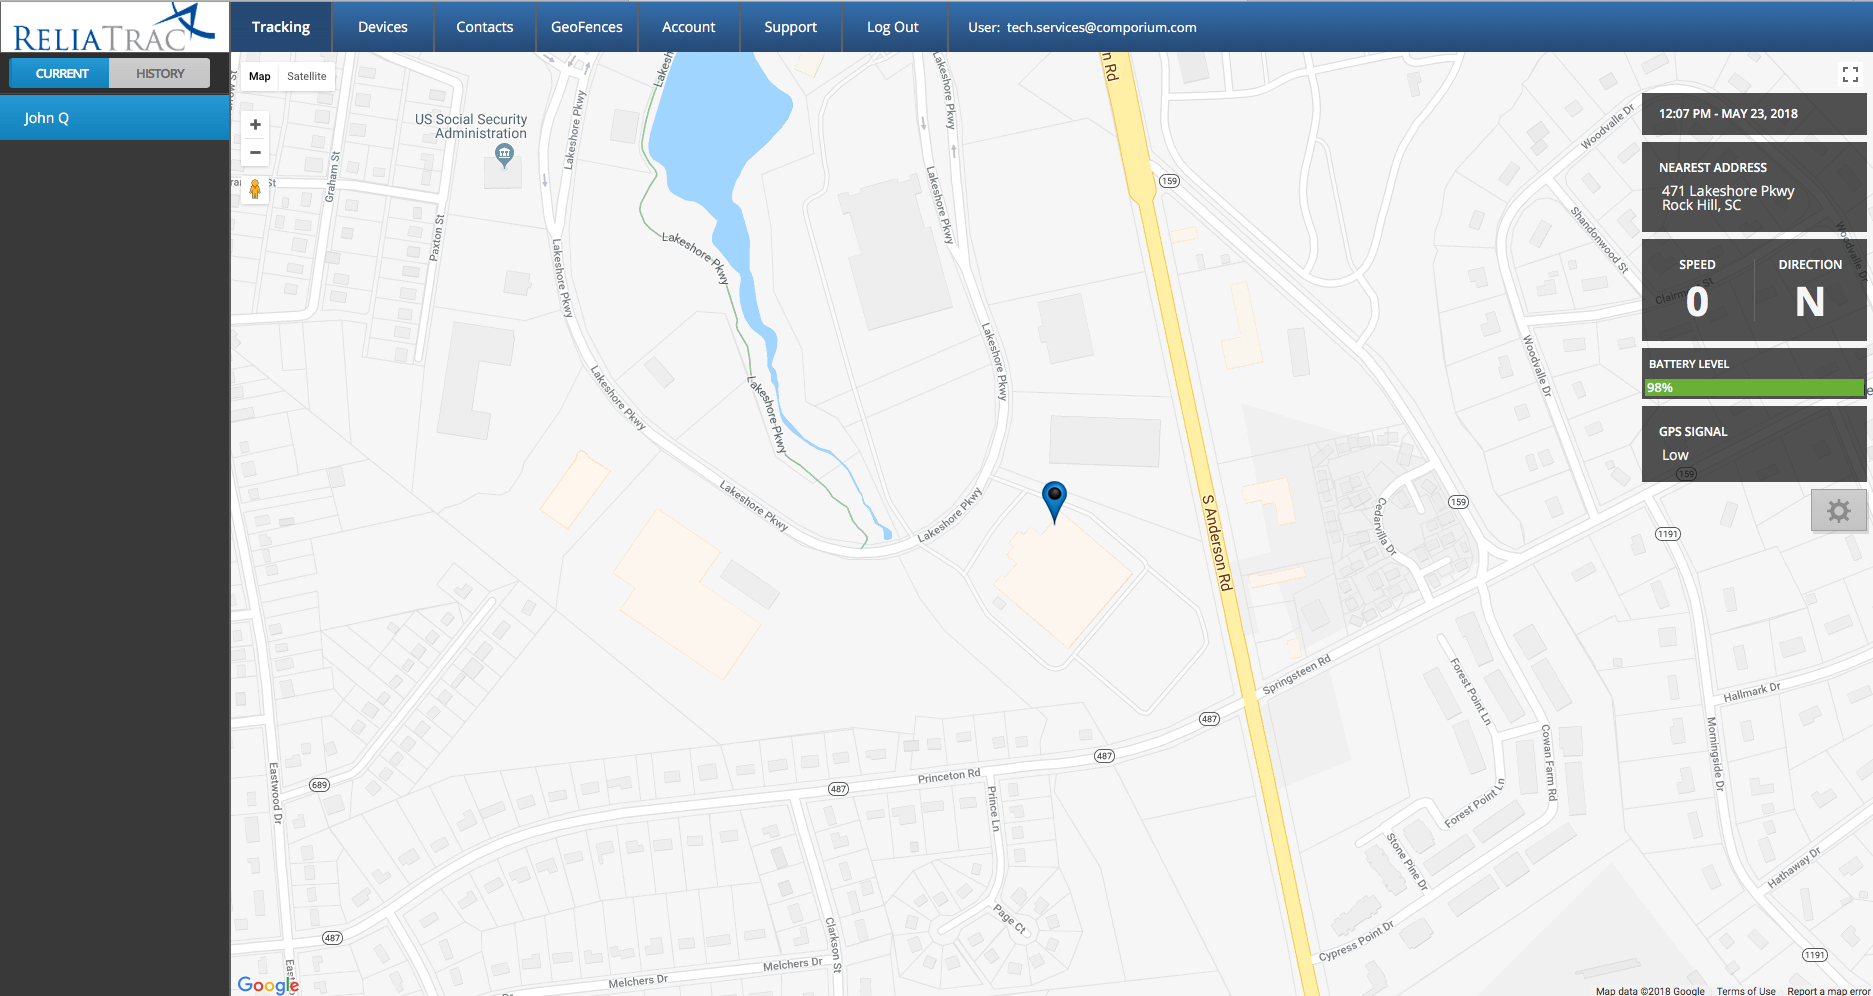
The ‘Tracking’ page is the primary page seen when you first log into the portal. By default, the map will show the current (or last known) location of the primary pendant on the account. On the left side of the screen, you will see the device name (all devices associated with account will be displayed), and the tabs “Current” and “History”. Actions that can be performed from this page:
-
View current location and status of device(s)
-
View history events and breadcrumb mapping of device(s)
Current – If the tab for “Current” is selected, the map shows the current (or last known) location of the pendant selected on the left side of the screen. The boxes on the right side of the screen show different stats for the selected pendant. These stats are time/date, nearest physical address to the selected pendant, speed and direction of travel, battery level, and GPS signal level. The settings icon will link you to the “Device” tab in the main menu.
History – If the tab for “History” is selected, the map shows a bread crumb trail of GPS checkins taken in 15 min intervals. Each 15 min checkin will log an entry on the history bar to the right and add a flag to the map.
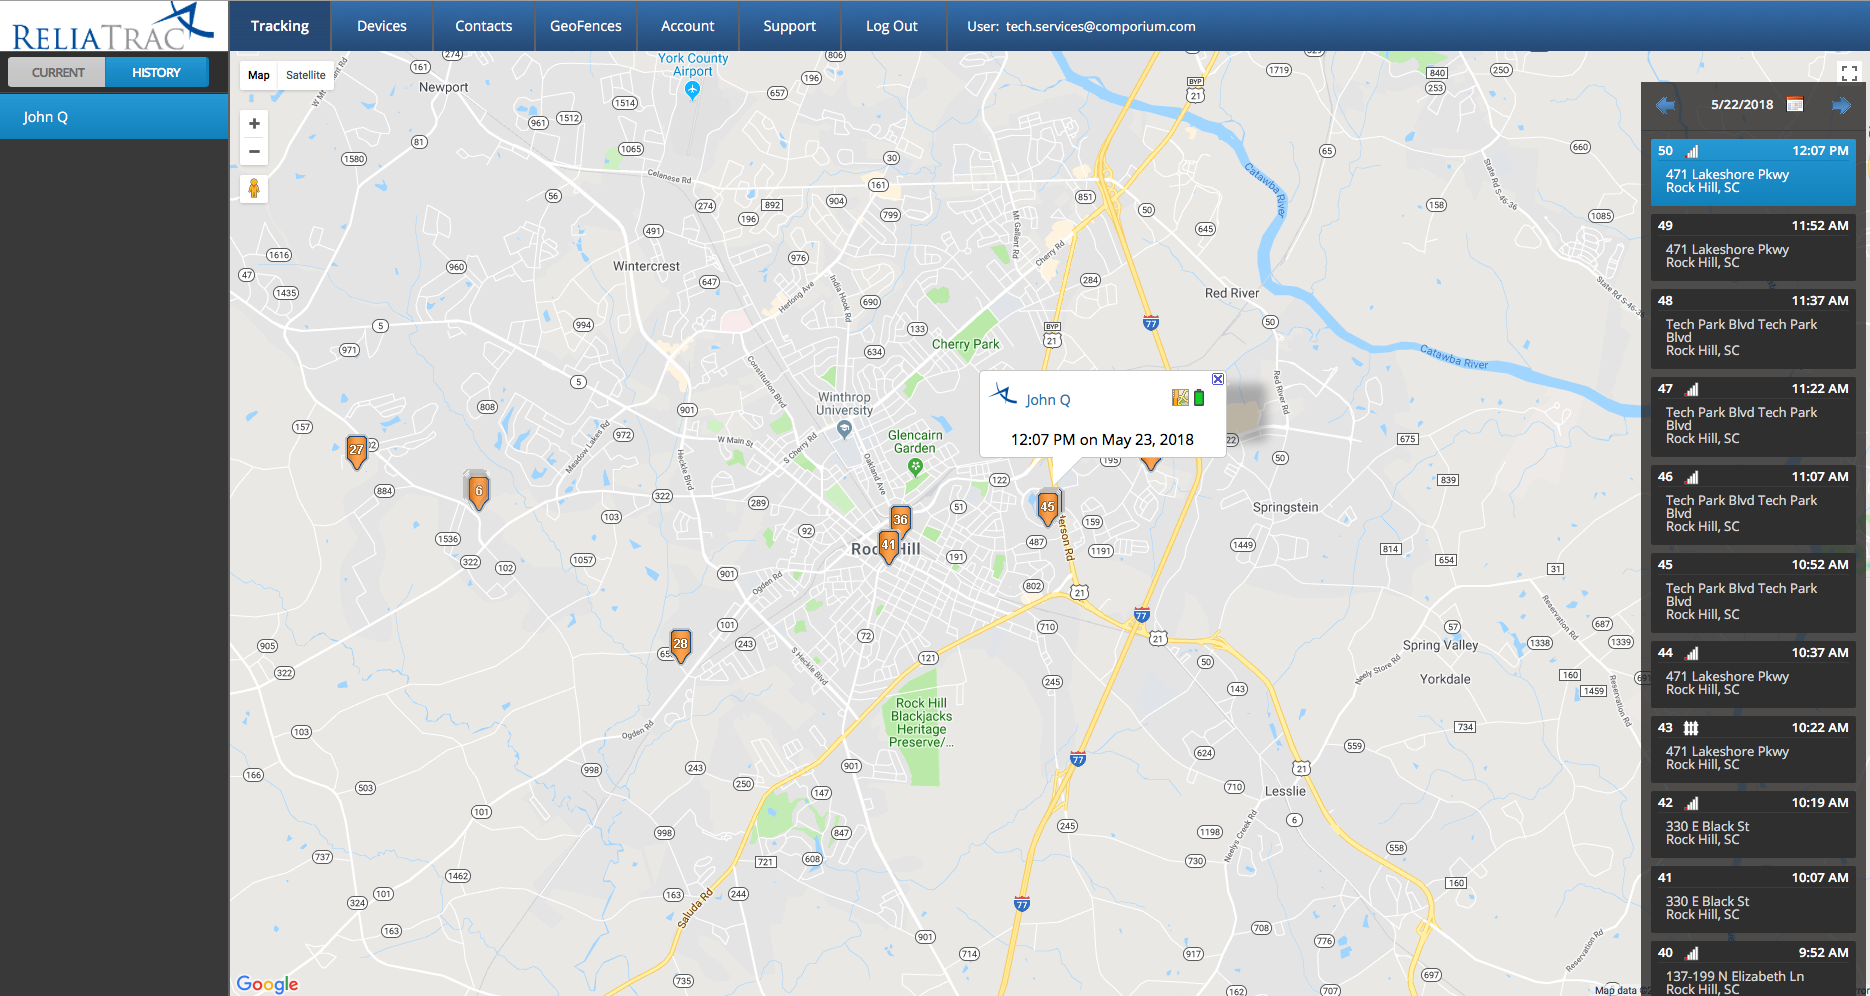
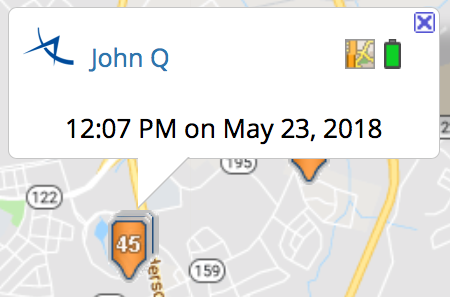
Selecting a flag, will show you the pendant name, time and date, battery level, and link to view a close up map view for that location.
The right side of the history page shows each 15 min checkin, along with the data associated with each checking. Clicking on any of these sections will center the map on that specific flag. This data includes the time of day, the address of the checking (or proximity), and the type of alert. These alert types are:
 SOS button press
-
 low battery
 -
 low GPS signal
 -
 power on
 -
 power off
 -
 geofence
Devices
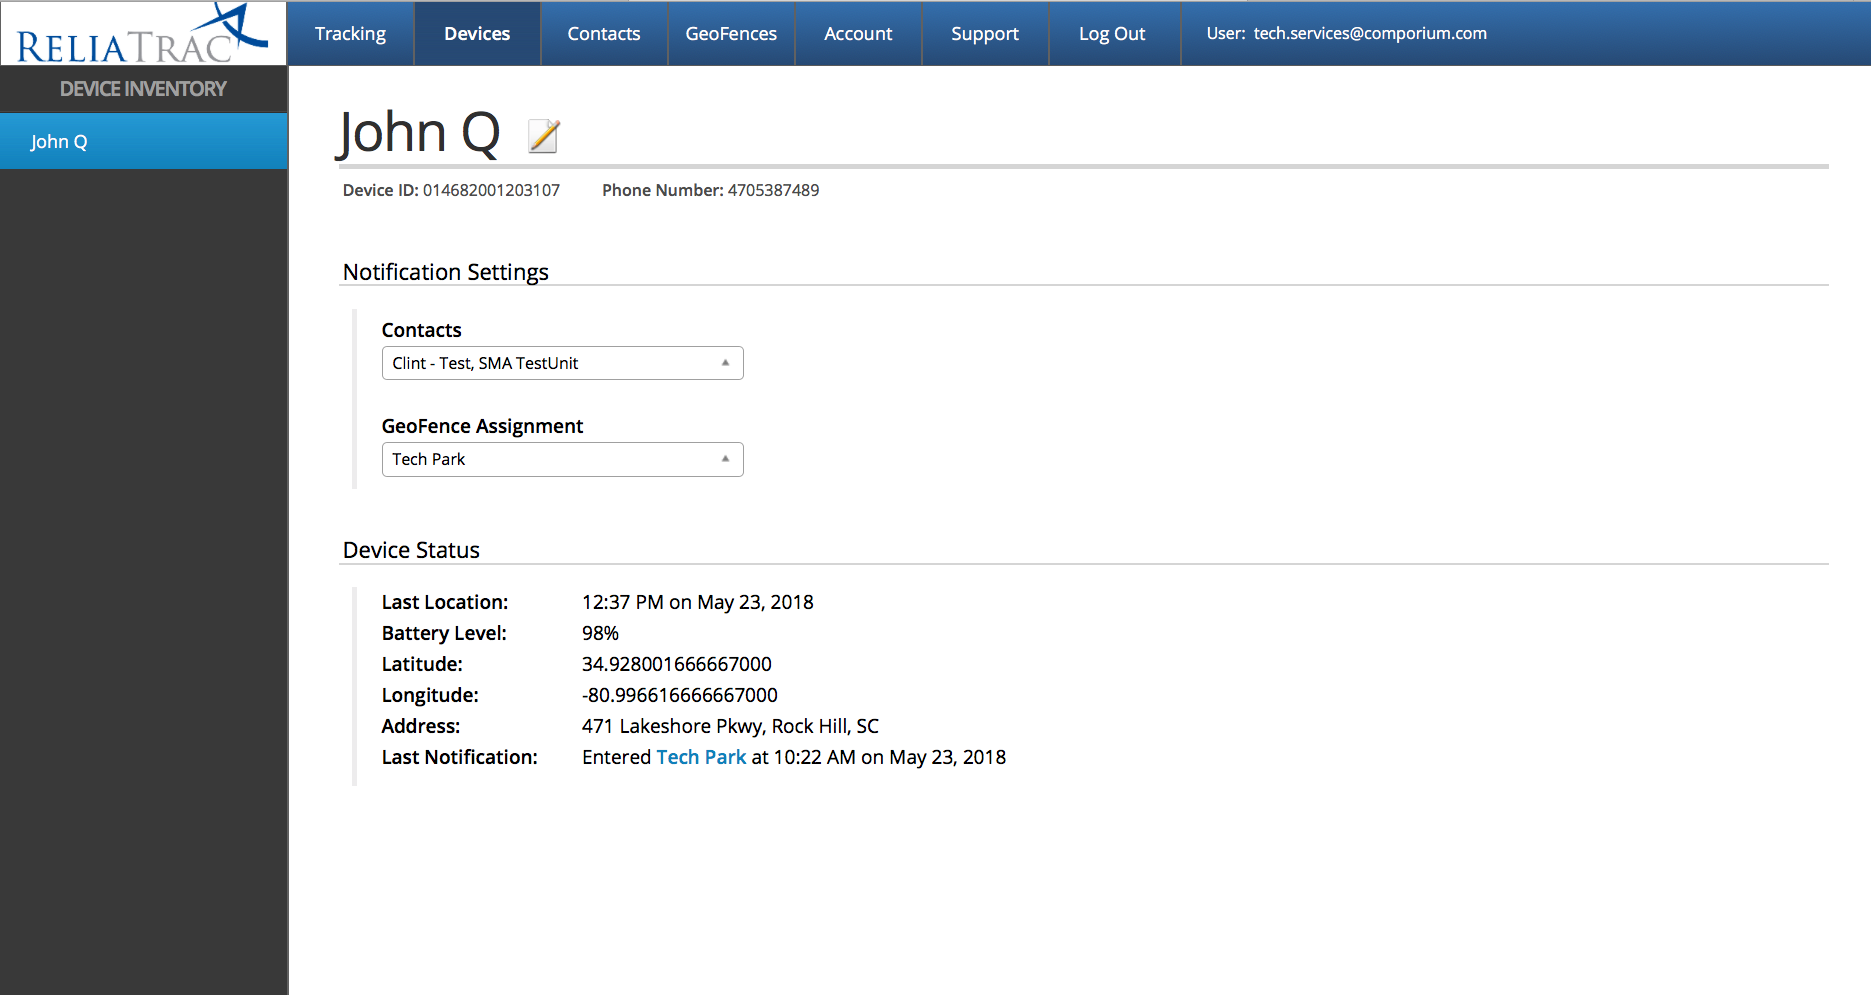
The “Devices” tab shows the specific details about each device associated on the account. The Devices page will list each device associated with the account on the left side of the page. Actions that can be performed on this page:
-
Modify device name
-
View device ID (IMEI #) and phone # associated with the device
-
View and modify notification and geofence settings
-
View current device status
Modifying a Device Name
To modify the name of a device from the device page, click on the pencil icon to the right of the device name  . Change the name of the device to your desired name and click the icon again to save your changes.
. Change the name of the device to your desired name and click the icon again to save your changes.Viewing the device ID and phone #
The device id is the IMEI # associated with your pendant and also servers as your account # at the Central Monitoring Station. The device phone # is the phone # associated with the pendant that allows the operators at the Central Monitoring Station to initiate a two way voice call. These fields are not editable.
Notification Settings
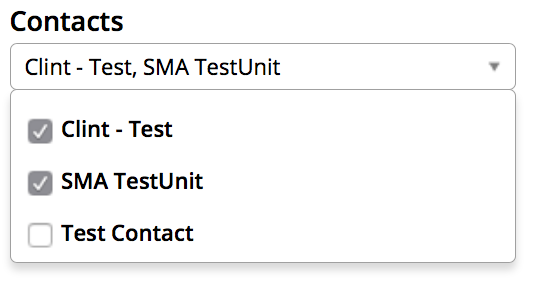
The notifications settings section allows you to choose which contacts and which geofence options this pendant will use. Based on the contacts and geofences configured in the other sections of the portal, you can choose which will apply to each specific pendant by selecting the drop down box(s) in the notification settings section. Check the box(s) for each contact and/or geofence that applies. This feature is useful if there are multiple pendants associated with each account.
Contacts
NOTE: The Central Monitoring Station is ONLY notified when the SOS button is pushed. All other notifications will be sent to the contacts in this section only.
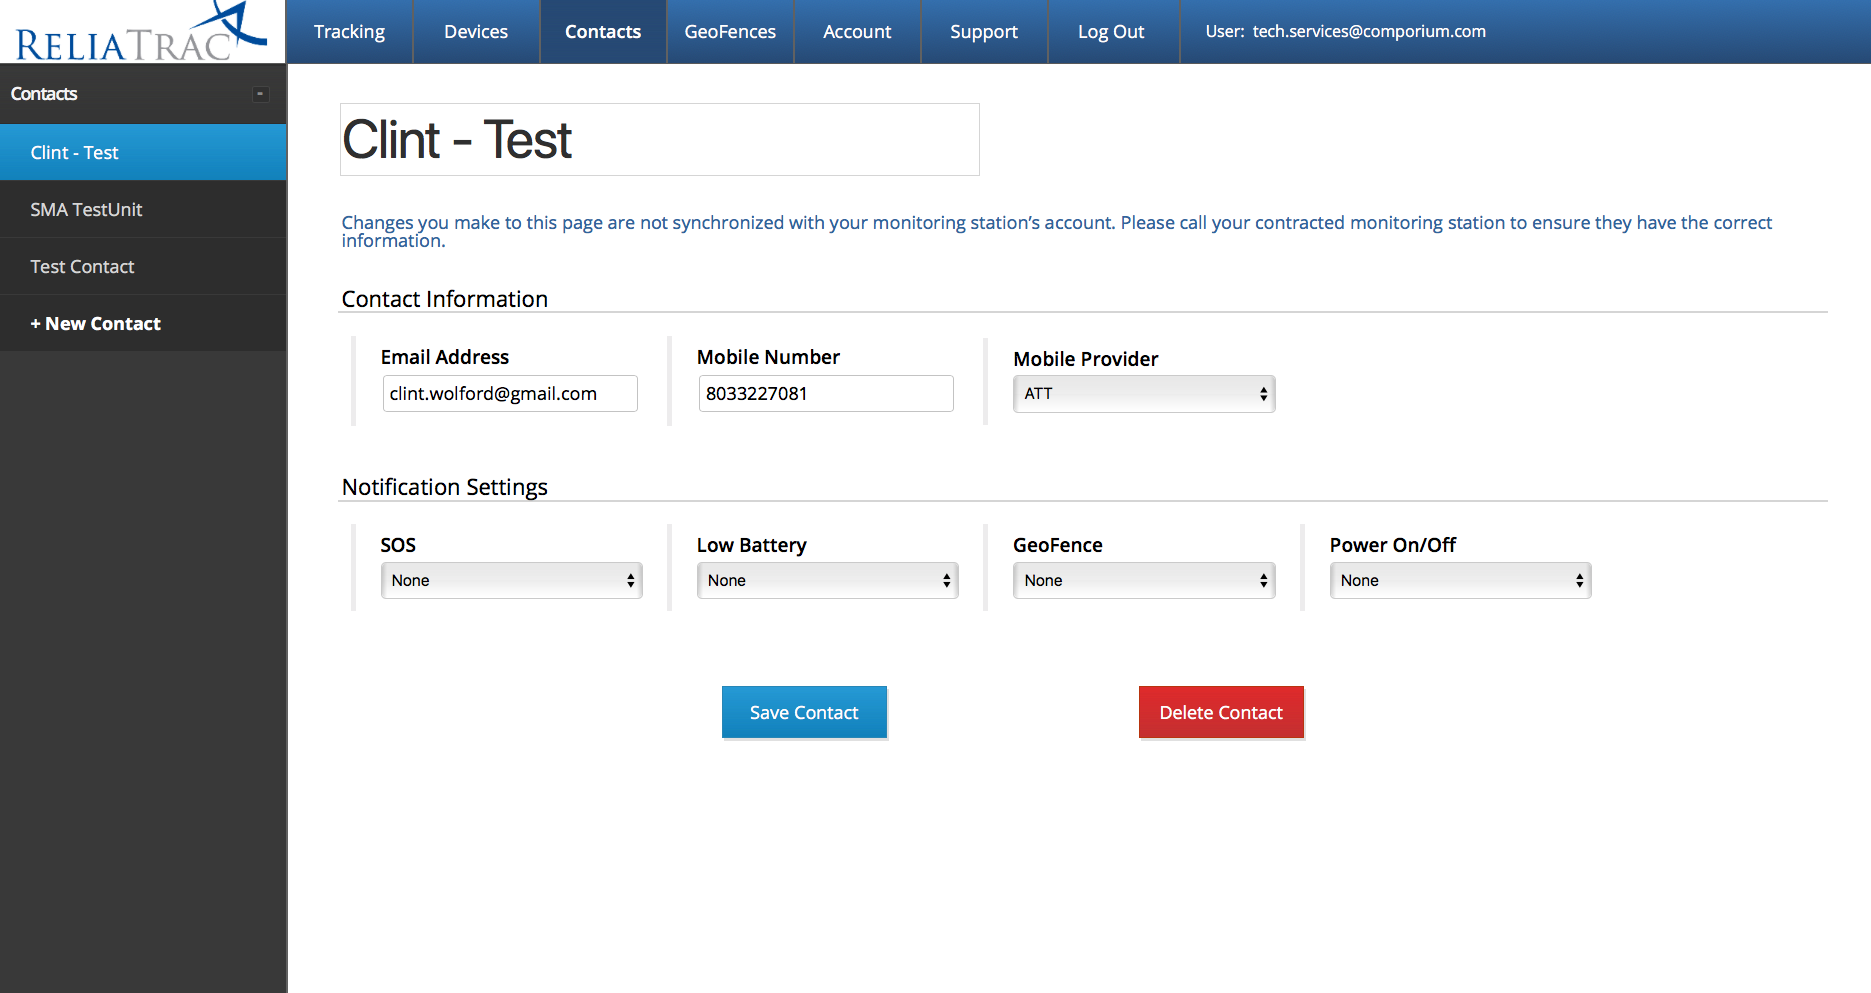
The Contacts page allows you to add contacts that will receive notifications when the pendants associated with each account perform different actions. Existing contacts are listed on the left side of the screen. Select an existing contact to modify each contact. Actions that can be performed on this page are:
-
Add/Edit contacts
-
Enable/disable email and sms notifications for each available option
Adding/Modify a Contact
To add a new contact, on the left side of the screen, select “New Contact”. To modify an existing contact, simply select the desired contact from the list. Enter/Modify the name of the contact and provide the following contact information:
-
Email address (required)
-
Mobile phone # (required)
-
Mobile provider (required)
In the notification settings section, choose from the following options:
-
SOS – When the primary button on the pendant is pressed (NOTE: If this button is pressed, a signal is sent to the Central Monitoring Station. This option is not customizable.)
-
None – No notification sent to selected contact(s)
-
Email – An email is sent to the selected contact(s)
-
SMS – An SMS message is sent to the selected contact(s)
-
Email + SMS – An email and an SMS are sent to the selected contact(s)
-
-
Low Battery – When the battery on the pendant drops below 10% (NOTE: No signal is sent to the Central Monitoring Station for a low battery event. This option is not customizable.)
-
None – No notification sent to selected contact(s)
-
Email – An email is sent to the selected contact(s)
-
SMS – An SMS message is sent to the selected contact(s)
-
Email + SMS – An email and an SMS are sent to the selected contact(s)
-
-
GeoFence – When the GeoFence has been crossed (NOTE: No signal is sent to the Central Monitoring Station for a GeoFence event. This option is not customizable.)
-
None – No notification sent to selected contact(s)
-
Email – An email is sent to the selected contact(s)
-
SMS – An SMS message is sent to the selected contact(s)
-
Email + SMS – An email and an SMS are sent to the selected contact(s)
-
-
Power On/Off – When the pendant has been powered on/off (NOTE: No signal is sent to the Central Monitoring Station for a power event. This option is not customizable.)
-
None – No notification sent to selected contact(s)
-
Email – An email is sent to the selected contact(s)
-
SMS – An SMS message is sent to the selected contact(s)
-
Email + SMS – An email and an SMS are sent to the selected contact(s)
-
Once all settings are chosen, click “Save Contact”.
If you wish to remove a contact, select the contact from the list on the left side of the screen and select “Delete Contact”.
GeoFences
The GeoFences section allows you to view/modify any existing GeoFences created. Existing GeoFences are listed on the left side of the screen. Actions that can be performed on this page:
-
Creating a new GeoFence
-
Modifying an existing GeoFence
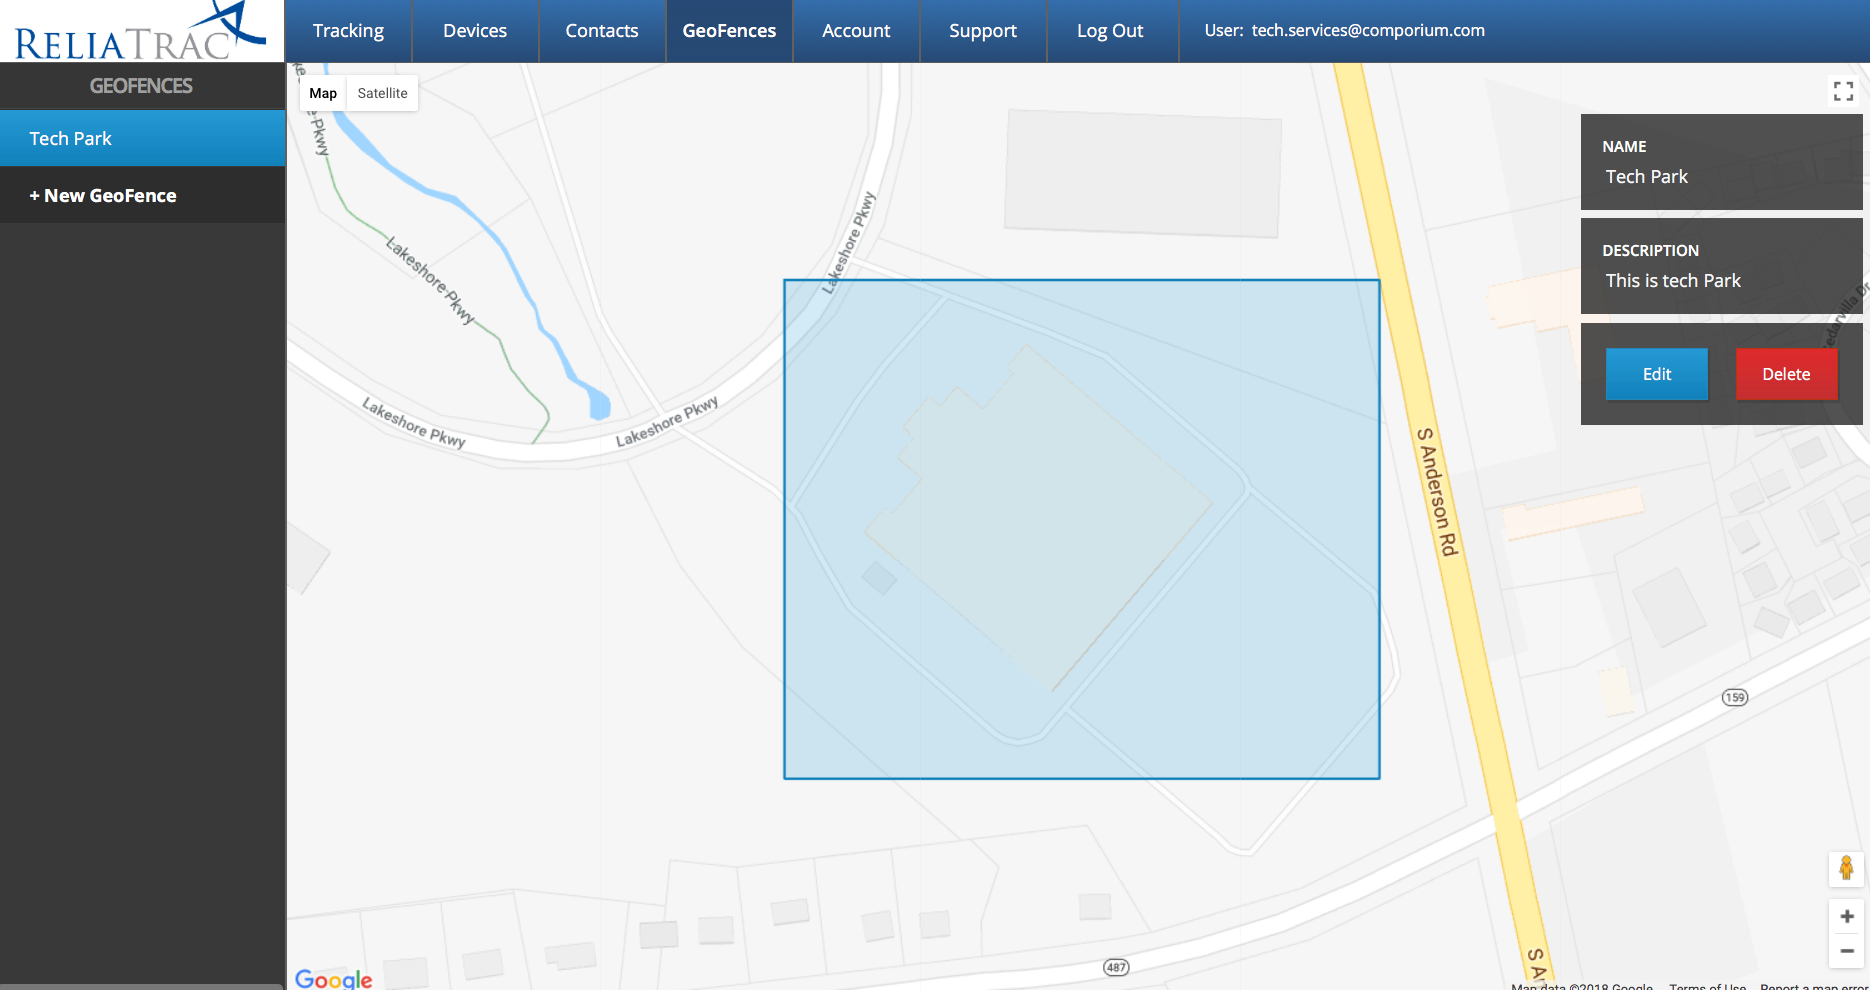
To create a new GeoFence:
-
Select the “New GeoFence” option from the list on the left (to modify, select the existing GeoFence from the list)
-
Provide a name and description for the new GeoFence in the boxes on the right.
-
Type an address of a location near where you wish to place the GeoFence and click “Find”
-
Use the flags to drag the GeoFence around the location you wish to monitor (NOTE: GeoFences can only contain 4 points and are square/rectangle shape).
-
GeoFence permiter events are reported every 15 min and not on real time violation of the boundary)
-
-
Click “SAVE” to save the new GeoFence.

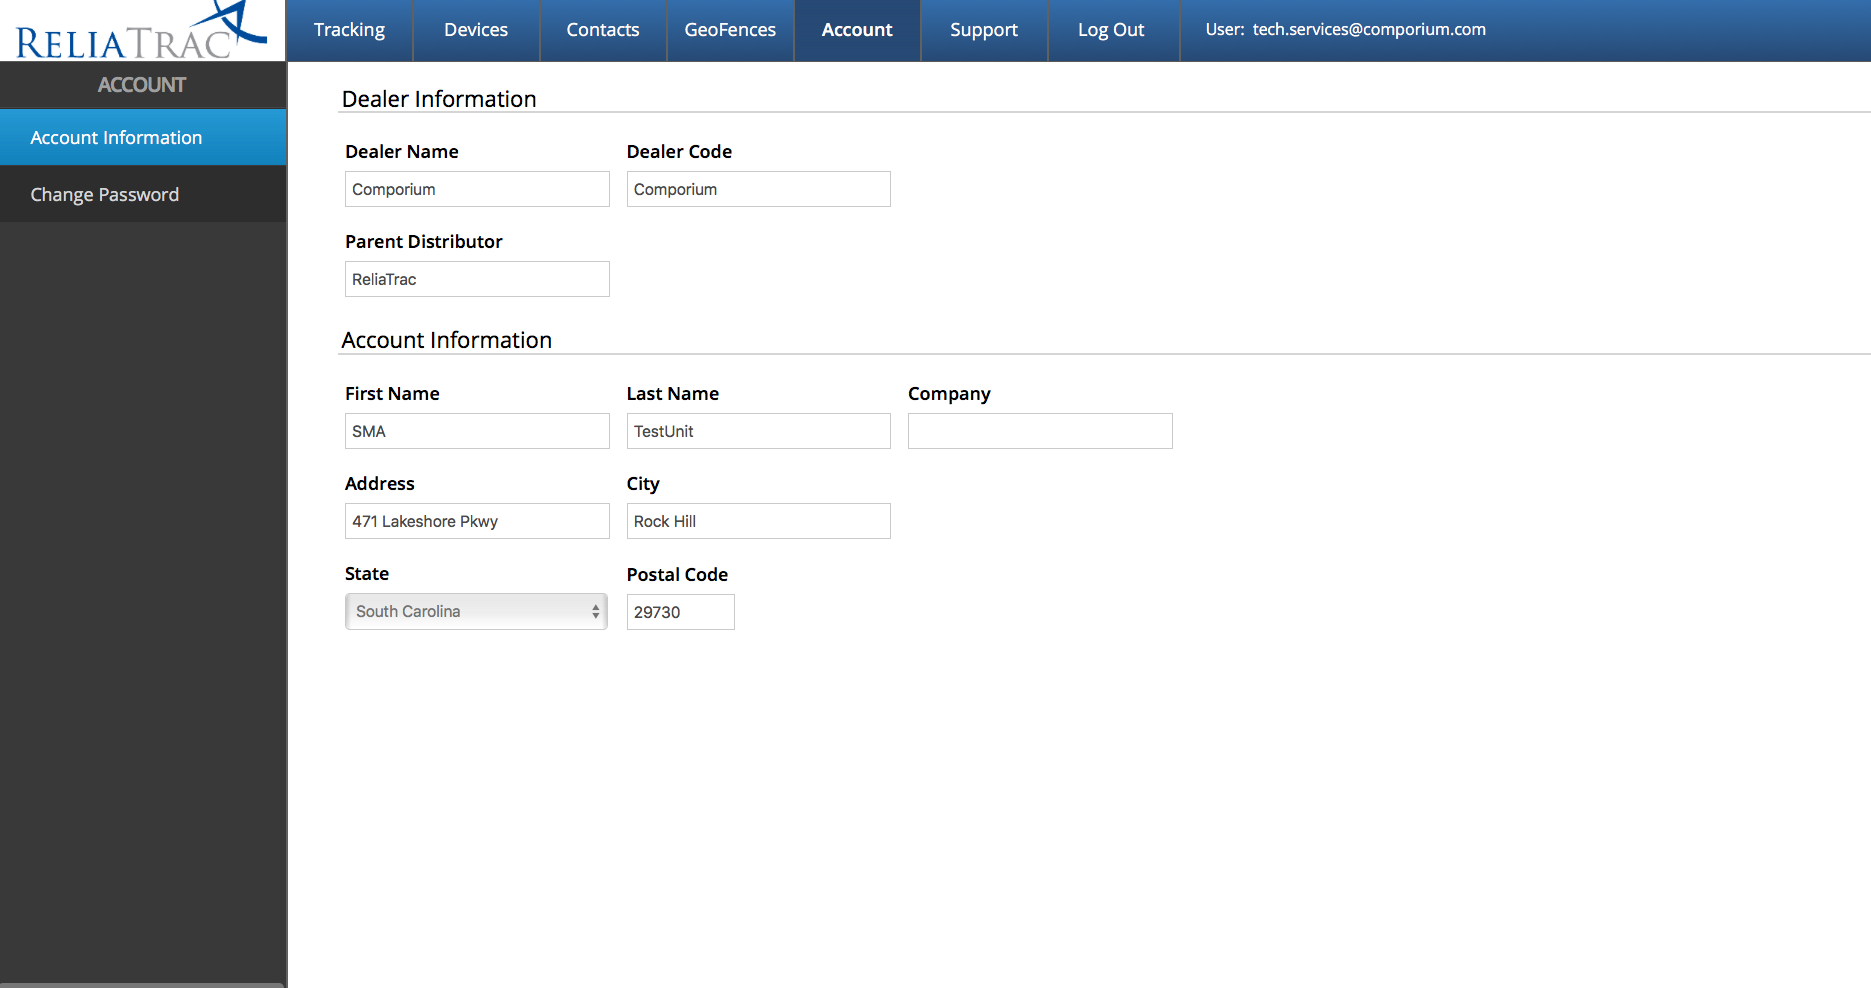
Account
The account page provides details of the account information. This information is not editable. Contact your service provider if information needs to be changed. Actions that can be performed on this page:
-
Change password
To change password, select “Change Password” from the list on the left. Enter the existing portal password, and the desired new password.