Before you begin installing your thermostat, please be advised that It is always a good practice to consult the owner’s manual for your HVAC system. If necessary, consult an HVAC technician to ensure proper installation.
Turn off the heating and/or cooling
Turn OFF the breakers or remove the fuses to the heating and/or cooling systems at the electrical panel.
In some regions, there may be a switch located near the furnace.
Determining Wiring Configuration
- Remove the old thermostat to expose the wiring terminals.
- Take a picture of the wiring for future reference.
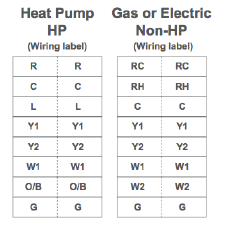
- Note the terminals attached to each wire and attach the matching label to the ends of the wires. Use the following table as a reference.
A jumper connects RC and RH as most combination heat and cooling systems use a single transformer. For systems where separate transformers are used, remove the jumper in place across the RC and RH terminals.
| Optima Thermostat Wiring Reference | |||
|---|---|---|---|
| Gas, Electric, or Oil (non-HP) | Heat Pump (HP) | ||
| R or RC* | 24 VAC for Cooling system | R or RC* | 24 VAC for Cooling system |
| RH* | 24 VAC for Heating system | RH* | 24 VAC for Heating system |
| C | 24 VAC common return | C | 24 VAC common return |
| — | Reserved | L | System monitor |
| Y or Y1 | Single / 1st stage cooling | Y or Y1 | Single / 1st stage compressor |
| Y2 | 2nd stage cooling | Y2 | 2nd stage compressor |
| W or W1 | Single / 1st stage heating | W or W1 | Emergency heat |
| W2 | 2nd stage heating | O/B | Changeover Valve |
| G | Fan Signal | G | Fan Signal |
| — | Reserved | — | Reserved |
Remove old thermostat terminals
Remove the old thermostat wiring terminals from the wall, taking care not to allow the wiring to fall inside the wall.
Tip: Wrap the wire ends around a long stick such as a pencil to prevent the wires from falling into the wall.
Install Mounting Plate
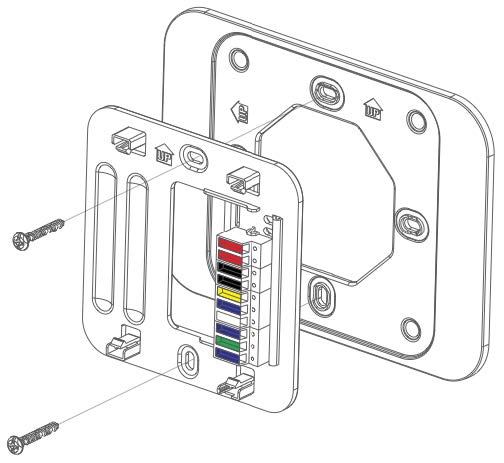
Remove the Mounting Plate from the back of the Optima thermostat. Use the included wall anchors and screws to attach the Mounting Plate to the wall, making sure the wires run through the center opening. Use the Trim Plate vertically or horizontally if desired.
Attach Wiring
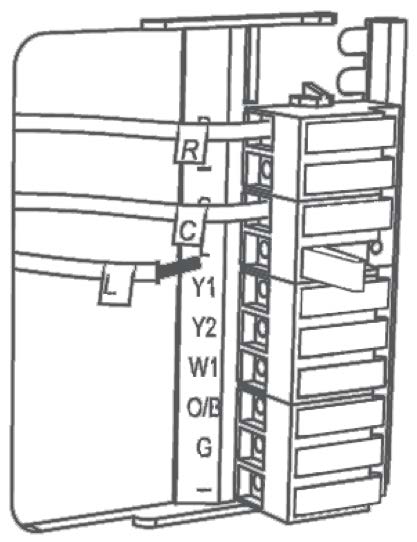
Before attaching the wires, match the wire (using the labels) to its corresponding terminal. Refer to the picture of the wiring taken earlier if necessary.
• Open the terminal by lifting the latch up.
• Push each wire into the hole of the terminal and push the latch down to secure the wire.
Install Batteries
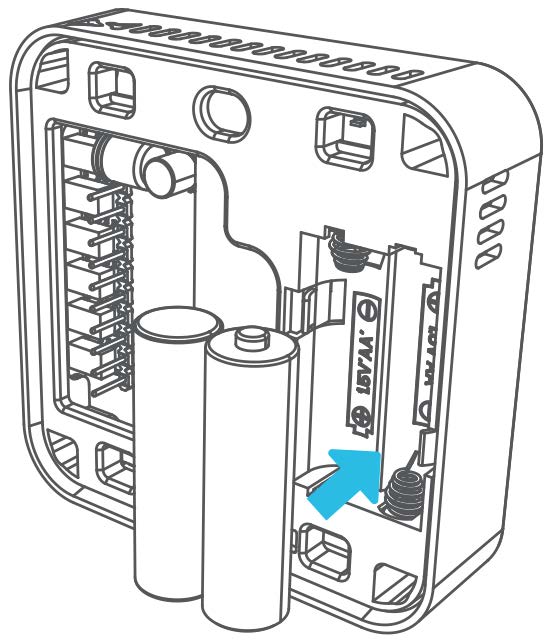
Insert the alkaline batteries into the back of the thermostat. Make sure the polarity of the batteries is correct. After inserting the batteries, the display will flash all the segments, followed by the version number of the firmware, then display US / CA with a blinking US.
Initial Configuration
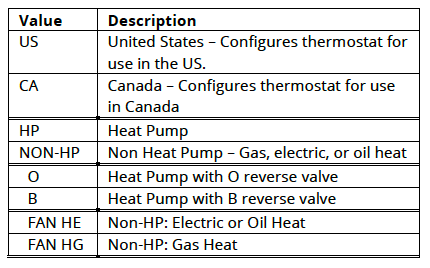
When configuring the thermostat, press the + or – button or use the slider ring to cause the desired value to blink, then press MODE to select the value. Using the table at right, select the country, then the type of system. After this configuration, the thermostat will display the Home Screen, and be ready for attachment to the Mounting Plate.
Attach Thermostat To Mounting Plate
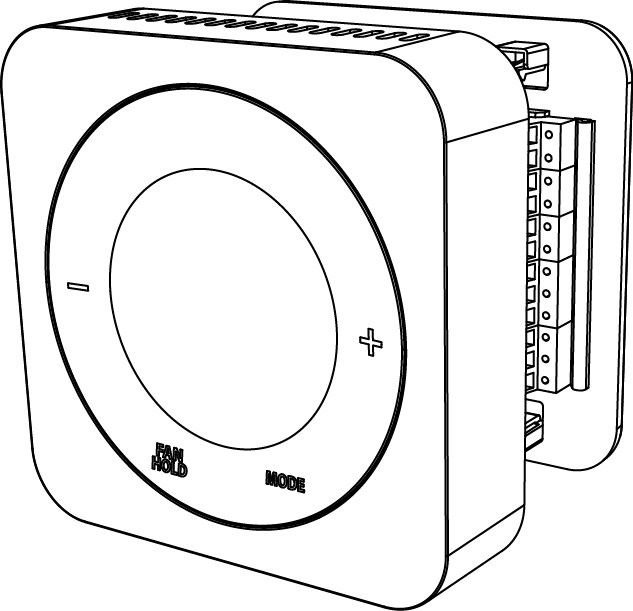
Attach the thermostat to the Mounting Plate by aligning the connector pins and the plastic retention posts and pushing the thermostat onto the Mounting Plate. Make sure the connector pins are not bent and that the thermostat is fully seated on the Mounting Plate.
Turn Power Back On To The HVAC System
Go to the electrical service panel or furnace switch and turn the HVAC system back on.
Configure Thermostat
The thermostat can now be used as a basic local thermostat. To enable the enhanced features, additional settings need to be configured. See the Configuring the Thermostat section by clicking the ‘Configuring’ link below.
Preparing the Thermostat to PAIR
- Go to the PAIR menu item on the OPTIMA thermostat (Hold Mode down for 3 seconds until CLOCK is displayed. Use the +/- to scroll until PAIR is displayed).
- Press MODE to select pairing mode. Display will show WILL PAIR.
- Press MODE again to enter pairing mode. Display will show the number 10 and Pairing.
- Wait for the connected home system to recognize the thermostat. The thermostat will blink IDENTIFY and return to the Home Screen when the thermostat has been added to the system. The blinking IDENTIFY will go away after 3 minutes.
Once you have completed the installation process, return to the activation flow to add your device to your system.
Configuring Pairing Defaulting Deleting