NOTE: IT IS ADVISED TO READ THE COMPLETE INSTALLATION MANUAL PRIOR TO BEGINNING THE INSTALLATION OF SMOKE/CO SENSORS. THE COMPLETE INSTALLATION MANUAL CAN BE DOWNLOADED HERE.
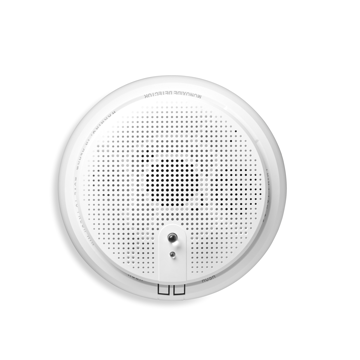
Honeywell’s wireless combination Smoke/CO detector is a battery-powered, multi-criteria smoke, CO detector with a built-in Zigbee transmitter for use with iControl panels. It enables central-station alarm monitoring of dangerous smoke and CO gas as well as maintenance supervision. It supports voice notification and iControl battery and temperature reporting clusters and over-the-air upgrades.
Specifications Installation Pairing Resetting to Factory Defaults
Features and Specifications
- Voltage: 3 Volts DC
- Battery Type: CR-123 lithium
- Thermal Sensor – 135° fixed heat
- Audible Signal – 85dBA
- Diameter – 5.95 inches
- Height – 2.03 inches
- Weight – 13.92 oz (383g)
- Operating Temperature Range: 0-38° C (32-100°F)
- Operating Humidity Range: 20-95% RH
- Mounting: Back boxes: 3.5″ and 4″ Octoagonal; Single-gang: 4″ Square: 2×4″, 3.5″ and 4″ round ceiling. Direct mount to wall or ceiling
- Zigbee Certified
- FCC Certified
- ETL Listed as compatible with iControl Technicolor TCA203 control panels
- US Model fully-compliant with ANSI/UL 268 and 2075 standards
Tech Specs
- Battery Type: 9V battery (lithium or alkaline)
- Battery Life: 1.6 years
- Dimension: 5 x 1.56 in
- Operating Temperature: Exterior: 32°F to 1
Installation
VISIBLE ANNUNCIATON
The W4 series detector has a multi-color top LED; Green, Red, and Amber. The LED is green for supervisory indication; it blinks during power on, reset, and during normal operation. The LED is amber to signal maintenance and trouble events. W4 utilizes the side LED windows to indicate alarm events; red for smoke and blue for CO.
INSTALLATION GUIDELINES
Ceiling: Detector should be at least 12 inches (30 cm) from any wall.
Wall: Detector should be no closer than 6 inches (15 cm) from ceiling.
- Do not install outdoors or in any environment that does not comply with the detector’s environmental specifications.
- Install in accordance with NFPA 72 and 720 standards. NFPA 72 and 720 define standards for both commercial and residential installation of smoke and CO detectors. Local laws involving CO detection should also be considered.
- If the installation can be interpreted as residential, consult the section of NFPA 720 that outlines residential applications. Chapter 9.4.1.1, for example, states that carbon monoxide alarms or detectors shall be installed as follows:
- Outside each separate dwelling unit sleeping area in the immediate vicinity of the bedroom.
- On every level of a dwelling unit, including basements.
- Consult NFPA 72, the local Authority Having Jurisdiction (AHJ), and/or applicable codes for specific information regarding the spacing and placement of smoke detectors.
- Do not install detectors in the following areas:
- In or near areas where particles of combustion are normally present such as kitchens, in garages, near furnaces, hot water heaters, or gas space heaters.
- In very cold or very hot areas that may be outside the detectors operating range.
- In wet or excessively humid areas, or next to bathrooms with showers.
- In dusty, dirty, or insect-infested areas.
- Near fresh air inlets or returns or excessively drafty areas. Air conditioners, heaters, fans, and fresh air intakes and returns can drive smoke away from the detector.
INSTALLATION
Add the CO/Smoke Detector to the home security/automation system:
Note: Smoke/CO sensors and other security devices require a professional installer to join them to the Touchscreen. Please contact a representative to schedule an installer.
1. Remove detector from packaging and separate the mounting base from the detector head.
2. Remove the battery tab from the detector, making sure the batteries remain fully seated. The detector will run through its initialization.
3. Once initialization is complete, the detector will prompt for language selection.
4. Press the Smoke test button to select English or the CO test button to select Spanish language settings. Once the language is selected the detector will enter Search mode.
5. Initiate pairing on your home control system using the instructions provided with it.
6. Press the Smoke and CO test buttons to finalize pairing.
MOUNTING
Physically mount the smoke detector in the desired location;
NOTE: NFPA 72 recommends the installation of detectors only after completing
construction or any other dust producing activity.
1. Disconnect alarm-notification appliances, service-release devices, and extinguishing systems.
2. Using two supplied screws and anchors, mount the base.
3. Attach the detector to the mounting base with a clockwise motion.
4. Test each detector as described in the Testing section.
5. Notify the proper authority that the system is in operation.
Joining to a Touchscreen
Smoke and CO sensors and other security sensors require a professional installer. Please contact a representative to schedule your installation today.
Joining to a Hub
- From the app, navigate to More > Manage Devices > Add Device > Smoke (or CO) Sensor
- Select “Continue” to begin the pairing process
- As the devices are discovered, they will appear on the screen
- Click “Done”
If the app does not locate your device, follow the steps below to reset your module to factory default settings and retry
Resetting
The W4 detector can be restored to its factory settings by pressing and holding both the smoke and CO test switch buttons simultaneously for 10 seconds which will cause the status LED to fast blink green. A release and repress of both test switch buttons will reset the detector to its factory settings. Reboot the detector by removing the batteries, waiting 10 seconds and then reinstalling the batteries. The device should rejoin the controller automatically.
