The titan outdoor camera offers a wide viewing angle and stable Wi-Fi to keep your life safe whenever and wherever you are.
SpecificationsWireless SetupWired SetupJoining to a HubPhysical InstallationResetting to Factory Defaults
SPECIFICATIONS
- Robust outdoor design with IP65 rated enclosure
- PIR Motion sensor to reduce false triggers
- Built-in infraed super LEDs for Night Vision (up to 32 feet)
- High image quality with HD 720p resolution
- Extended and stable connectivitiy with 2×2 MIMO Wi-Fi
- Supports standard Power over Ethernet (PoE – IEEE802.3af) to reduce clutter and provide better Wi-Fi connections for outdoor cameras
- Camera Dimensions: 2.7″x2.7″x1.2″
- PoE Wi-Fi Bridge Dimensions: 2.16″ X 4.47″ X 1.69″
- Camera Temperature range: -4 to 104 deg F
- PoE Wi-Fi Bridge Dimensions: 32 to 104 deg F
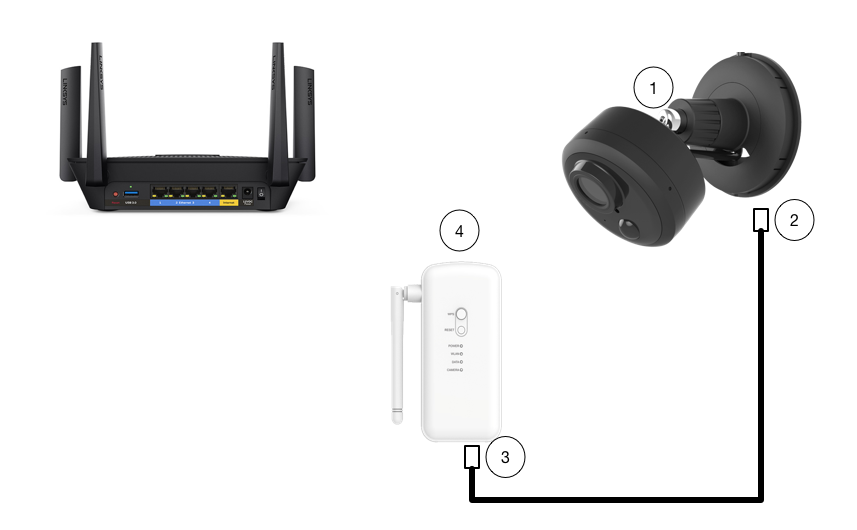
Setup (Wireless)
1. Mount the Camera onto the camera stand by gently tightening the camera to the stand
2. Connect the provided Ethernet cable to the Ethernet port located on the bottom of the Camera
3. Connect the other end of the Ethernet cable to the port labeled “Camera” on the Poe WiFi Bridge
4. Plug the PoE WiFI Bridge into a live power outlet
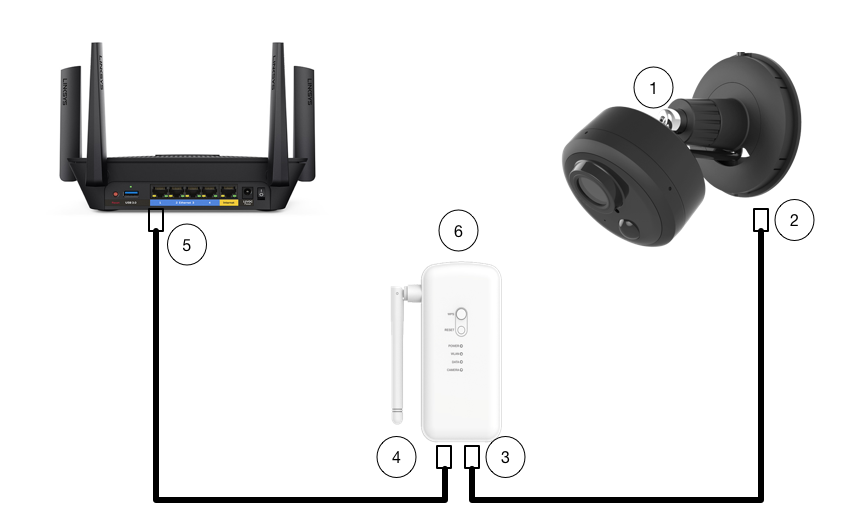
Setup (Wired)
Note: Wired setup differs than the in app instructions
1. Mount the Camera onto the camera stand by gently tightening the camera to the stand
2. Connect the provided Ethernet cable to the Ethernet port located on the bottom of the Camera
3. Connect the other end of the Ethernet cable to the port labeled “Camera” on the PoE WiFi Bridge
4. Plug a 2nd Ethernet cable into the “Data” port on the PoE WiFI Bridge
5. Plug the other end of the 2nd Ethernet cable into any open LAN port on the back of your home router
6. Plug the PoE WiFi Bridge into a live power outlet and wait for three green lights to appear (Power, Data, and Camera)
Joining to a Hub
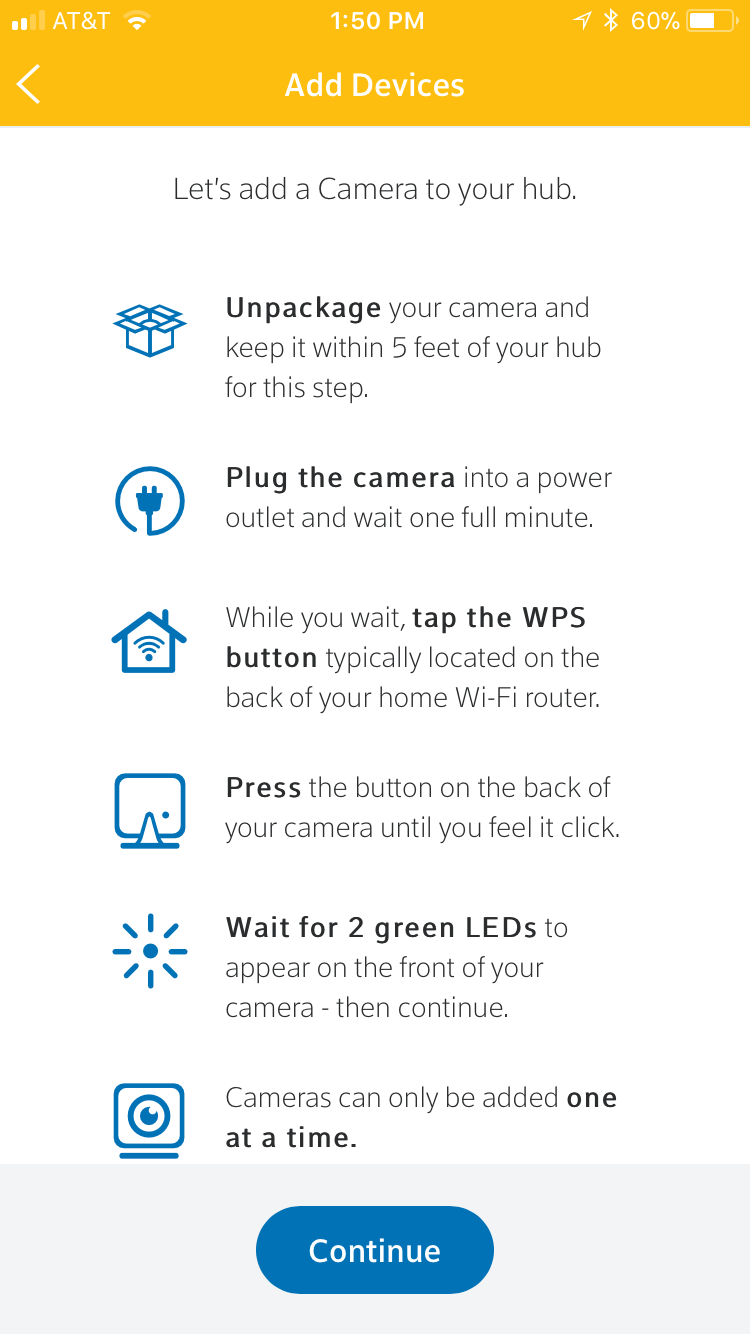
- Once your camera is physically powered on and connected according to the directions above, launch your app and navigate to More > Manage Devices > Add Devices
- Select “Cameras” and then “Continue”
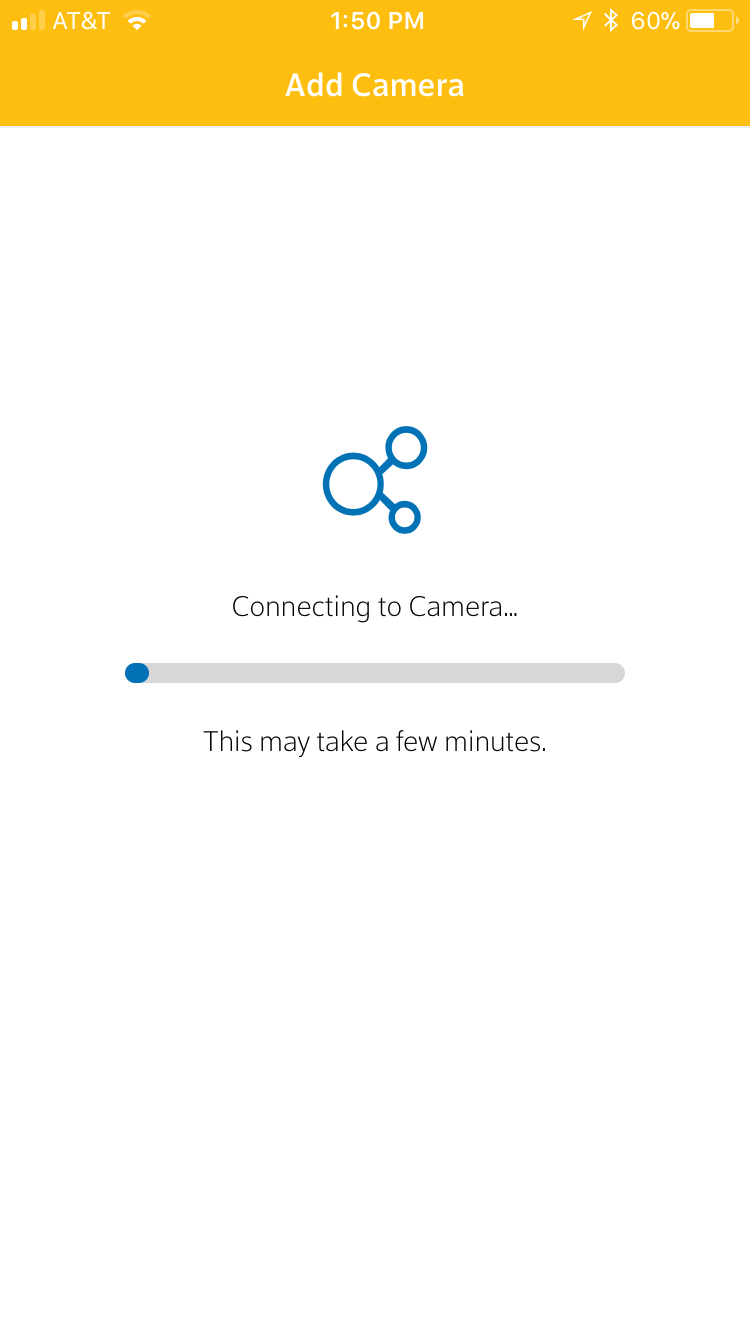
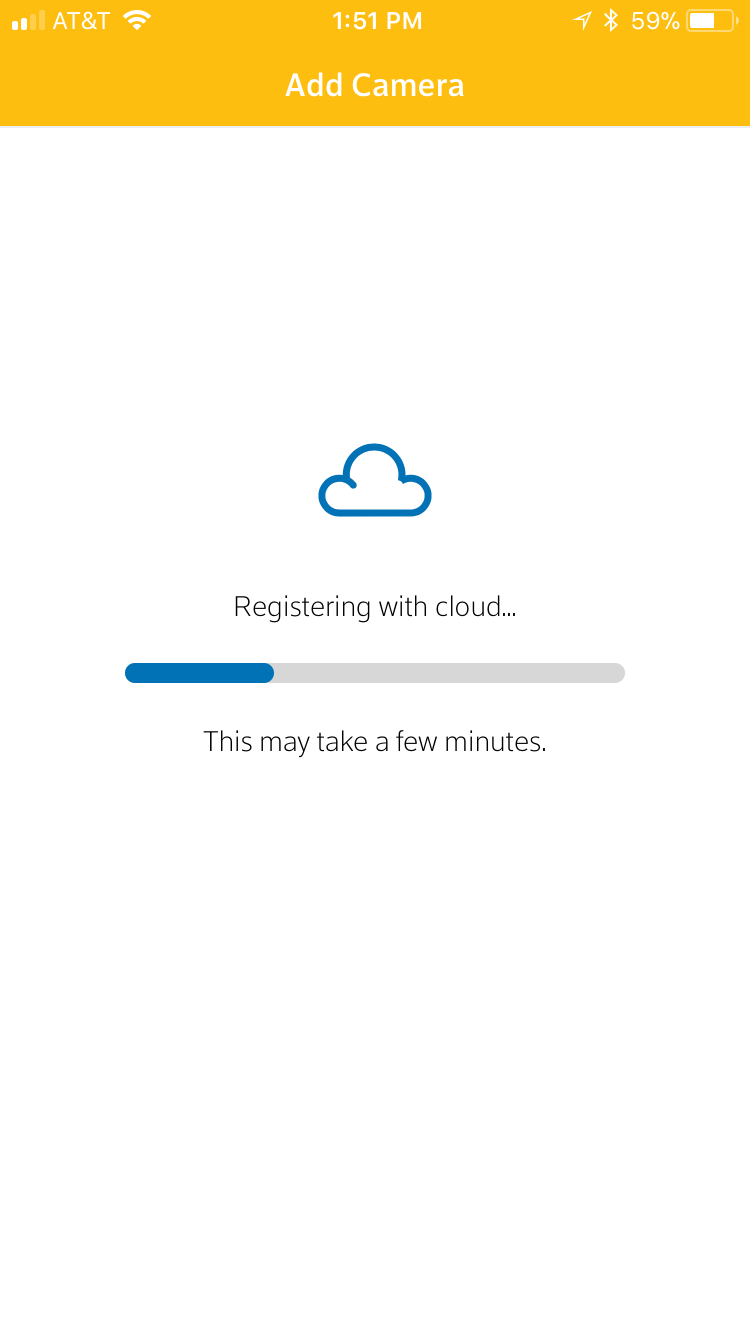
- The hub will now begin searching for the camera and associating with the cloud servers
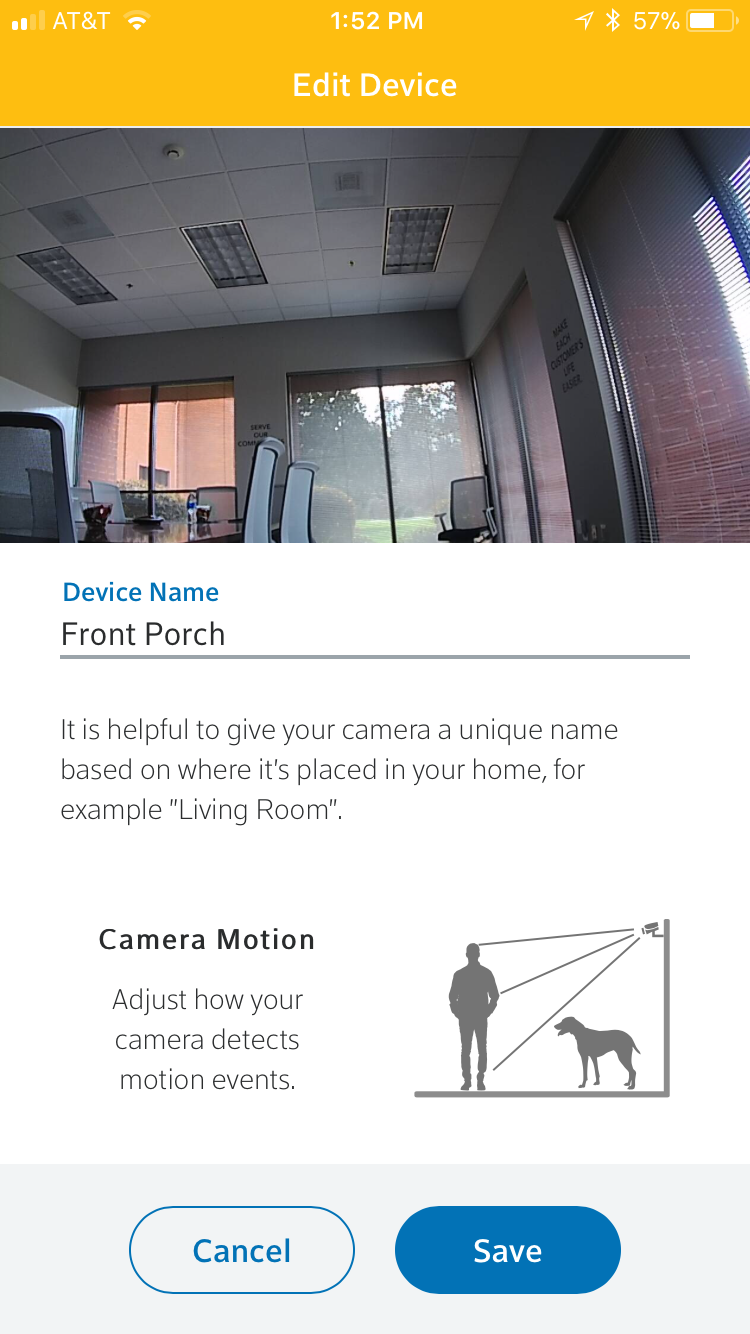
- Once the camera is located, you will receive a success message

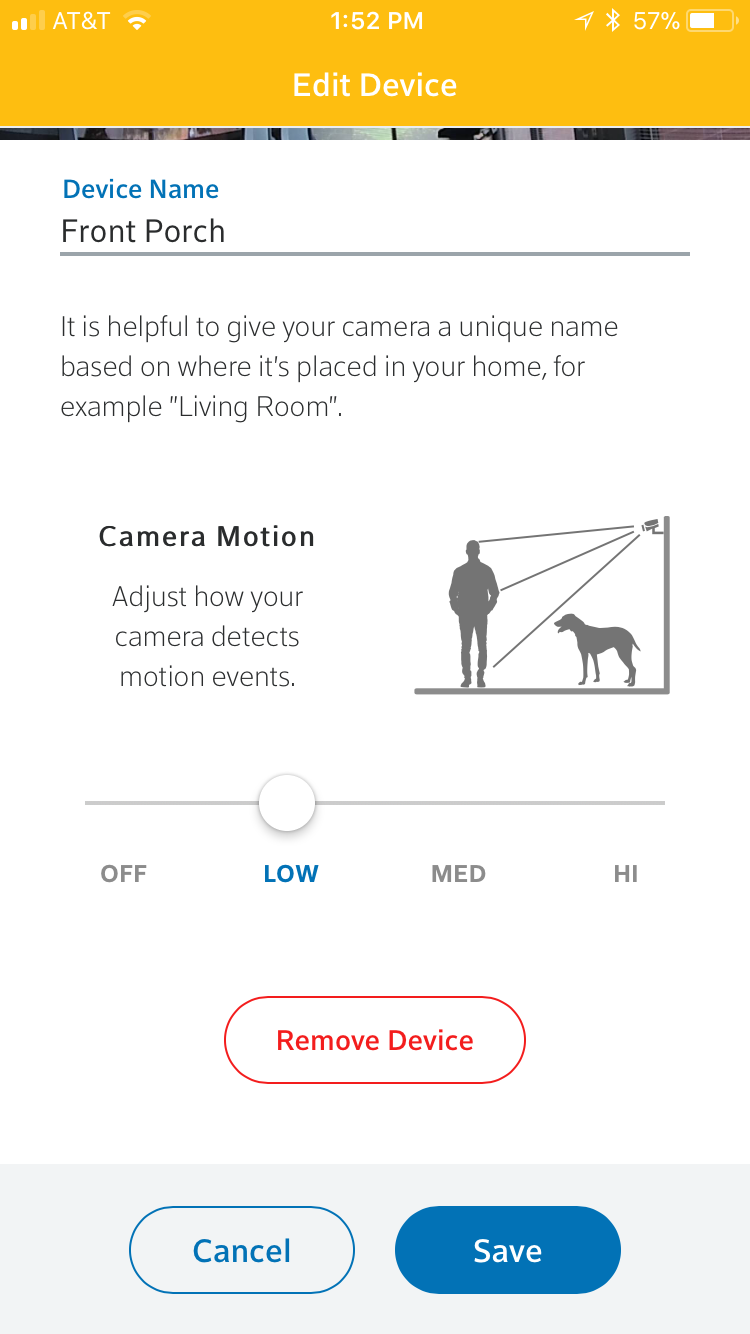
- After selecting continue, you will have the options to rename your camera and adjust the motion sensitivity. It is advised to leave the motion sensitivity on the lowest settings until you are able to test and determine which level is best for your application.
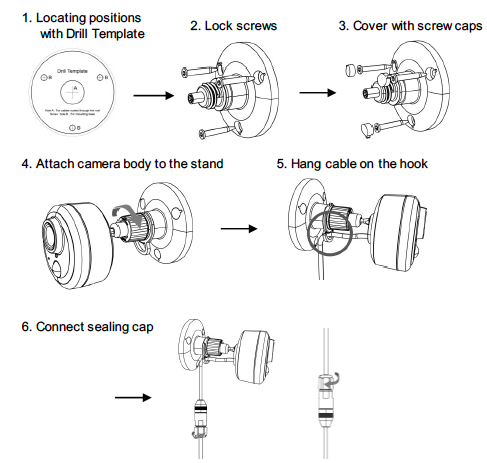
Physical Installation
- Use the provided drill template to mark where you would like your camera to be installed.
- Use the provided screws to secure the base of the camera
- Cover the screws with the provided weather proofing caps
- Attach the camera to the mount
- Hang the cable on the hook
- Connect the sealing cap around the Ethernet Cable
NOTE: Make sure your camera is configured and added to your system prior to permanently mounting.
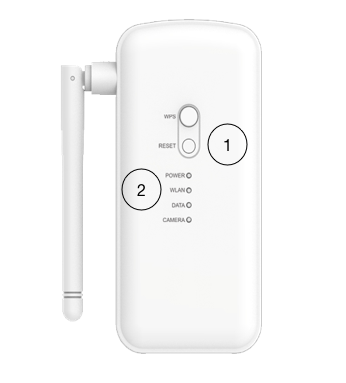
Resetting to Factory Default Settings
- Press and hold the ‘Reset” button on the PoE WiFi Bridge for 20+ seconds while plugged into power.
- WLAN LED will begin to blink RED confirming device has been reset.