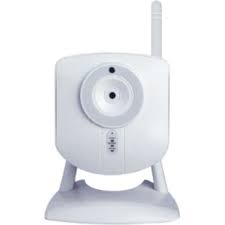
Compact Wireless Fixed IP Camera
The RC8021 is a Low Cost IP Network Camera. It comes with a smart and efficient Omni Vision 7725 CMOS low lux sensor to improve low light performance. This camera can provide MPEG-4 Simple Profile video and Motion-JPEG video dual streams simultaneously.
Specifications Installation Pairing Resetting
SPECIFICATIONS
- Dual Video Streaming (H.264, JPEG) for High-Quality Videos Compatible with Mobile Phone 3GPP Live Video Streaming VGA (640 x 480) Resolution for Image Quality Automated Motion Detection and Email Alerts 802.11b/g Wireless Connectivity Supported
- Battery Type: Outlet
- Battery Life: N/A
- Dimension: 100mm x 100mm x 130mm (4.3″ x 3.94″ x 5.12″)
- Operating Temperature: 32° to 104°F
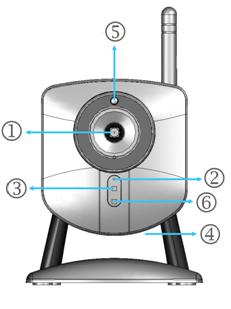
Front of Camera

1. Lens
No physical adjustment is required or possible for the lens, but you should ensure that the lens cover remains clean. Image quality is degraded if the lens cover is dirty or smudged.
2. Microphone
The RC8021 camera has a built in mircophone(Not Currently Supported)
3. Power LED
On – Powered on
Off – No power
Blinking – The Power LED blinks during start up. This can take up to 20 seconds
4. Reset Button
The reset button is located at the bottom of the indoor camera. This button is recessed; a pin or a paper clip can be used to push it. It can be activated at any time when the camera is powered on.
Reset to default manufacturer values and reboot: When pressed and held for over 10 seconds, settings of the Indoor Camera will be set to their default manufacturer values.
Note: After this procedure is completed, the Power LED will blink three times to confirm that the reset was successfully completed.
5. Privacy Button
When the privacy feature is enabled, live video cannot be accessed.
On (Green) – The privacy feature is activated
Off – The privacy feature is not in use
6. Network LED
The Network LED displays the current status of the Indoor Camera’s connection to the Network via either the Wired or Wireless interface.
On (Green) – Indoor camera is connected to network.
Off – Indoor Camera is not connected to the Network
Blinking (Green) – Data is being transmitted.
On (Amber) – If the LED is on for 5 seconds, the WPS is not processing successfully
Blinking (Amber) – WPS
Rear of Camera
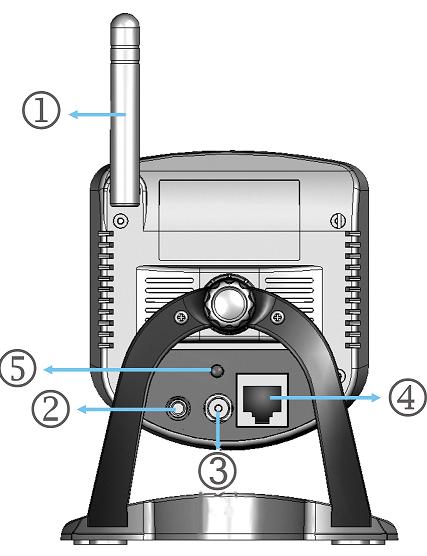
1. Antenna
The antenna is adjustable; best results are usually obtained with the antenna positioned vertically.
2. Speaker Out (Not currently supported) An external speaker can be plugged in here.
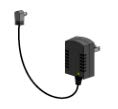
3. Power Port
The supplied 5V power adapter plugs in here to power on the Indoor Camera.
Note: Do not use any other power adapters since doing so may damage the Indoor Camera.
4. Ethernet Port
The supplied Ethernet cable plugs in here enabling you to connect your Indoor Camera to your router.
Note:
Plugging in the Ethernet cable will disable the Wireless interface. Only one (1) interface can be active at any time.
The Ethernet cable should only be connected or disconnected when the camera is powered OFF. Attaching or detaching the Ethernet cable while the camera is powered on does NOT switch the interface between wired and wireless.
Detaching the Ethernet cable when the camera is powered ON will disconnect the indoor camera from the network.
5. WPS Button (Not currently supported)
The WPS feature when used with other WPS enabled wireless devices automatically creates an encryption-secured wireless connection. The gateway is not enabled for WPS connectivity.
What’s In the Box
 |
|
 |
 |
|
| Camera | Antenna | 6′ Power Adapter | Stand | Mounting Screws |
 |
||||
| Ethernet Cable |
Setup
Begin with assembling and attaching the antenna to your camera and place it in the upright position. This will improve the wireless signal of the camera.
Connect one end of the supplied ethernet cable to the ethernet port on the back side of the camera.
Connect the other end of the ethernet cable to the LAN port of the HUB.
Connect one end of the power adapter to the back side of the camera.
Connect the other end of the power adapter to a live power outlet.
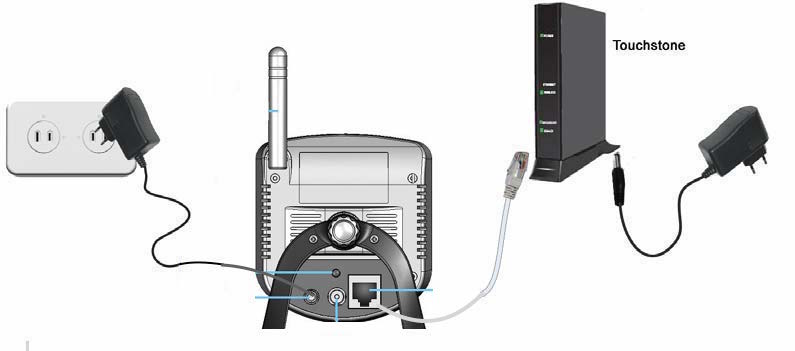
Navigate to the Subscriber Portal>Settings>Cameras>Add Camera to begin the pairing process.
Pairing
To a Hub
You can add cameras when you activate Touchstone, or at a later time. If you want to add a camera that was not included with the original Touchstone package, make sure your service provider supports it.
To add a camera, click SETTINGS on the toolbar.
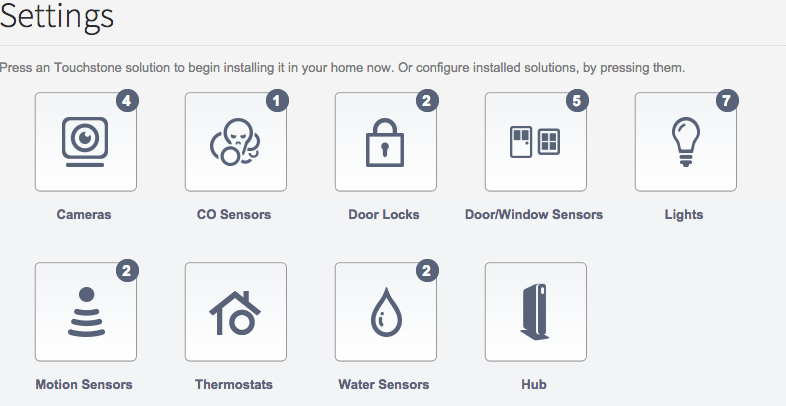
Click Cameras to display the camera settings page.
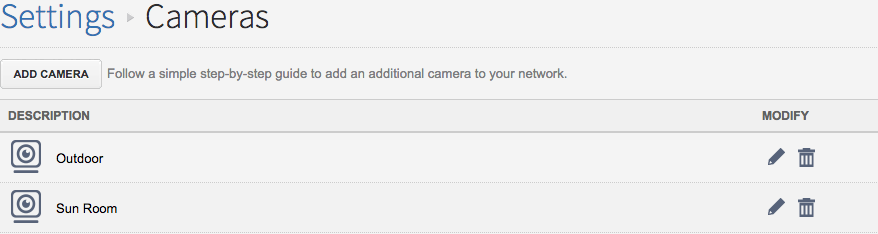
Click ADD CAMERA and follow the on screen prompts.
To a Touchscreen
From the main page of the Touchscreen, touch the Settings Icon  and enter your 4 digit master code. This is the code that you use to arm and disarm your system. Choose ‘Home Devices’ from the categories page.
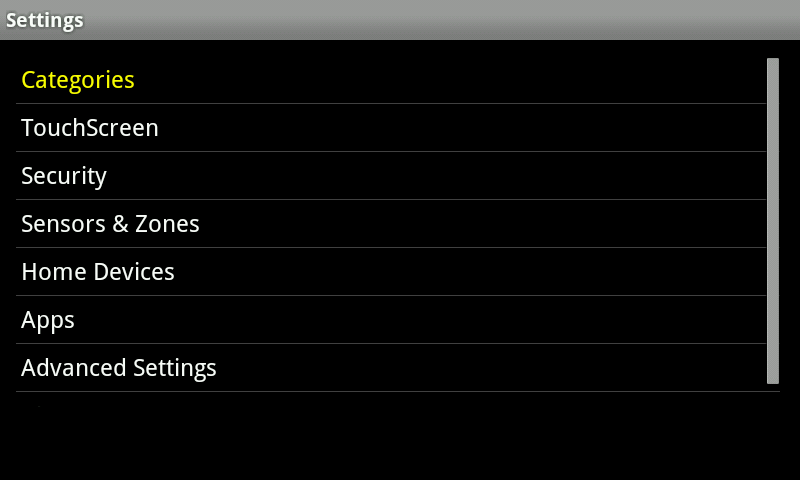
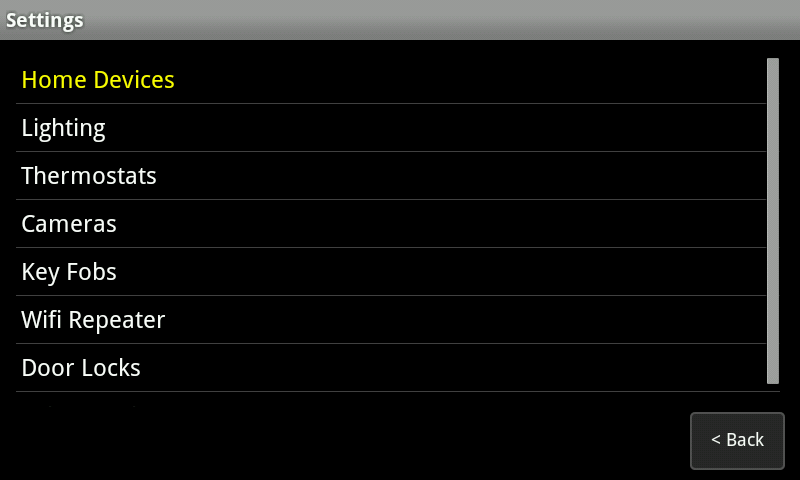
Select ‘Cameras’ and then choose ‘Add a Camera’.
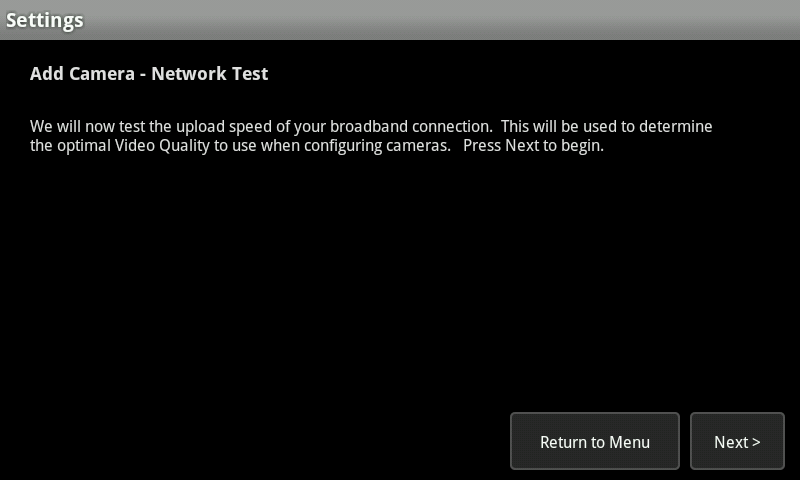
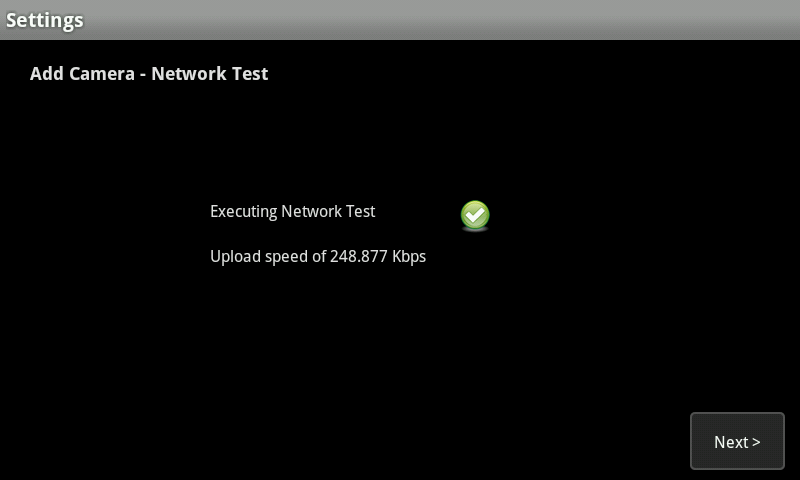
If this is the first camera you are adding to your system, or it’s been awhile since a camera was added, you will be asked to run a Network test. Click ‘Next’ to begin the test and ‘Next’ again once the green check mark appears.
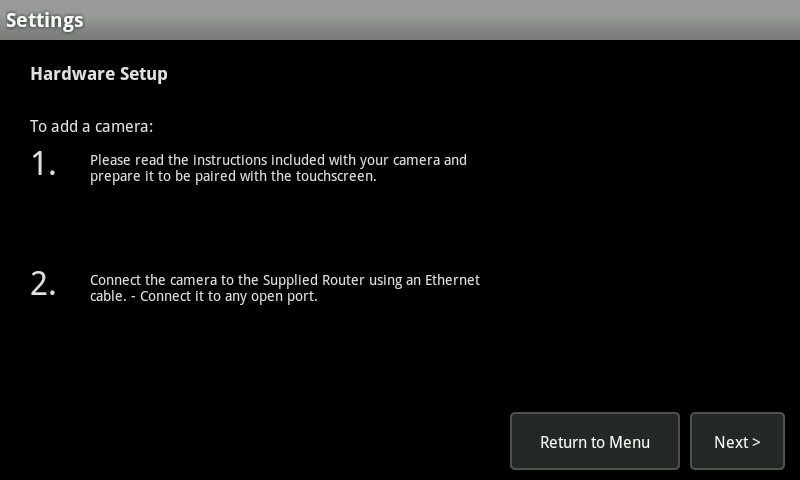
Following the instructions included with your camera, prepare it to be added to your Touchscreen. Click the ‘Next’ button to progress through the setup.
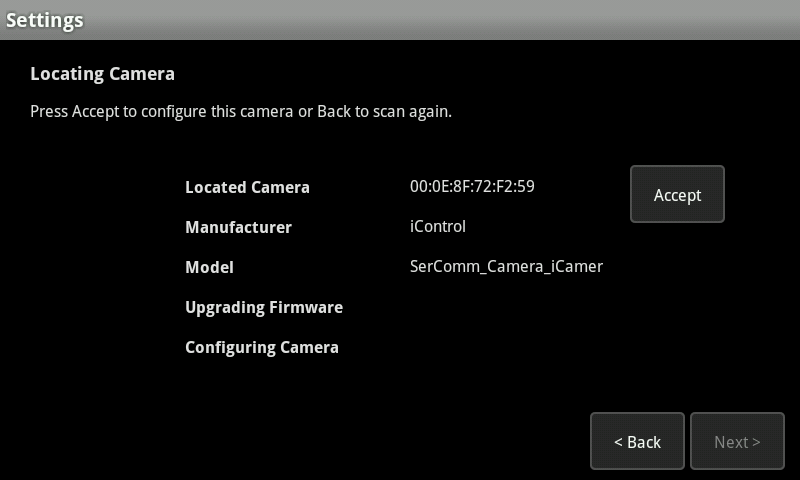
Once the Touchscreen locates your camera, you will be shown the general information. Click ‘Accept’ and then click ‘Next’ to proceed to the next screen.
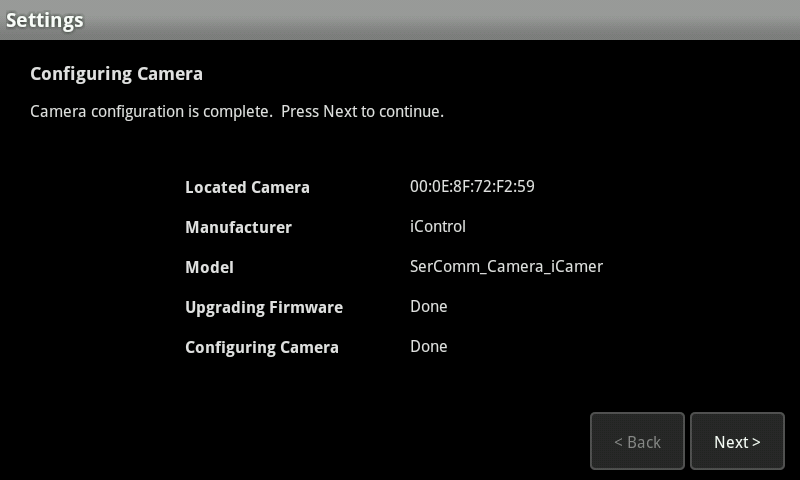
The camera will now check to see if it’s firmware is up to date. If an update is needed, it will download the file at this time. Once the ‘Upgrading Firmware’ and ‘Configuring Camera’ lines say ‘Done’ beside them, click ‘Next’ to proceed to the next screen.
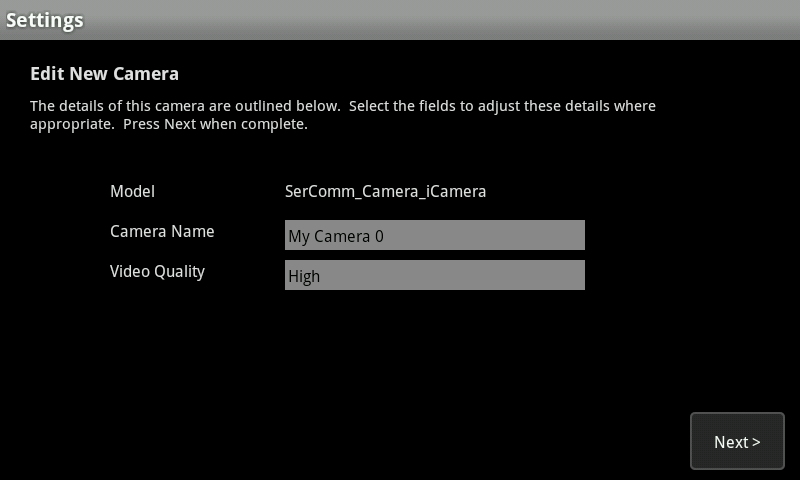
Once the camera pairs, you will have the opportunity to give your camera a name and select the video quality. Make sure to give your camera name that you’ll recognize such as ‘Driveway Camera’.
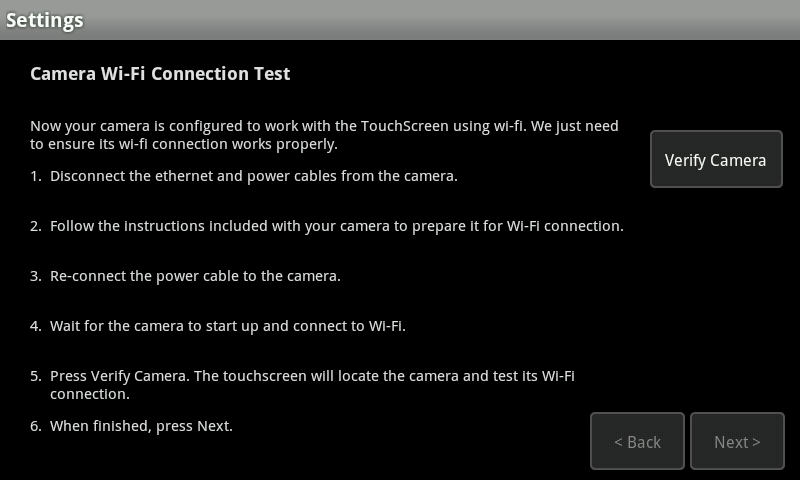
Now that the camera is named, it’s time to locate it where you want. Follow the onscreen instructions and select ‘Verify Camera’ when the camera is ready. Once the camera is located, click ‘Next’.
Your camera is now ready to be aimed where you want it and used.
Defaulting
The Reset button(#4 in image below) of the RC8021 camera is recessed; a pin or paper clip can be used to press it at any time when the camera is powered on. When pressed and held for (10) seconds, settings of the RC8021 Camera will be set to their default manufacturer values.